Commercial Roof Inspection Process Guide for Property Managers
Commercial roof inspection finds damage and needed repairs to protect building integrity.
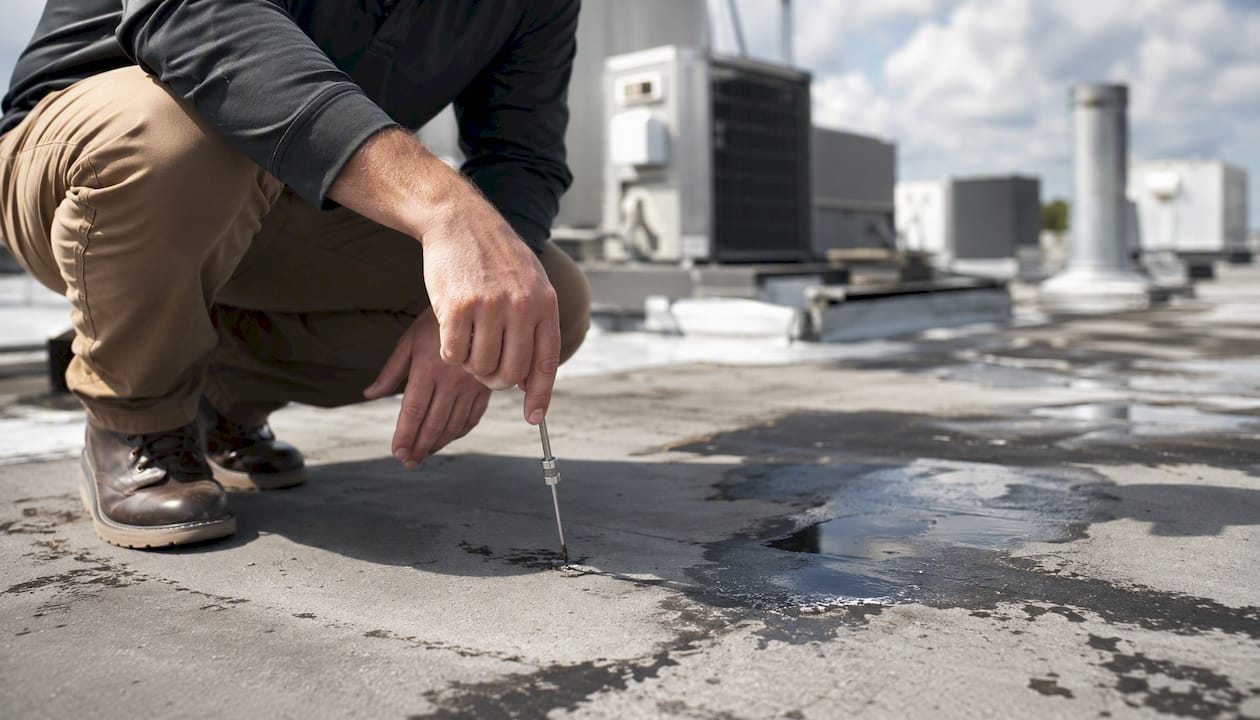
A professional commercial roof inspection is a defined, repeatable process: gather records and plan access, review the interior for moisture and structural clues, walk the exterior in a systematic sequence, run targeted diagnostics when needed (infrared, core sampling, or nuclear moisture testing), and close with a photo-backed condition report that drives repairs, warranty action, or capital planning. That sequence is the same whether you manage a 5,000-square-foot retail strip or a 200,000-square-foot distribution center.
For a property-specific scope, reporting standard, and maintenance cadence, review Hytz Roofing's commercial roof inspection services for Tampa Bay buildings.
Here’s what to do right now before you schedule your next inspection:
- 📋 Pull your records. Gather existing warranties, prior inspection reports, repair invoices, and any as-built roof drawings.
- 📅 Book before storm season. GAF recommends inspecting at least once per year, ideally before your local storm window opens.
- 🔍 Confirm inspector credentials. Ask for IIBEC (RRC or RRO), HAAG, or manufacturer certification before anyone steps on your roof.
- 🚨 Request GPS-tagged photos. Dated, location-stamped images are what insurers and manufacturers need to honor claims.
Pro Tip: *Ask your inspector for a sample report before they arrive. A professional report usually includes 8–25 pages with 20–60 photographs; if the sample is a one-page checklist with no photos, find someone else.
Table of Contents
- What types of commercial roof inspections are there?
- How often should you inspect a commercial roof?
- How do you prepare for a commercial roof inspection?
- What does the step-by-step commercial roof inspection process look like?
- Which diagnostic tests go beyond a visual inspection?
- How do you choose a qualified commercial roof inspector?
- What does a commercial roof inspection cost?
- What should you do after the inspection?
- Why do contractor credentials matter for inspections?
- Key Takeaways
- The part of commercial roof inspections most owners get wrong
- Hytzroofing offers certified commercial roof inspections in Tampa Bay
- Useful sources for commercial roof inspection standards
- FAQ
What types of commercial roof inspections are there?
Not every inspection serves the same purpose. Booking the wrong type wastes money and can leave documentation gaps that hurt your warranty or insurance claim.
| Inspection Type | Typical Timing | Diagnostic Methods | Key Deliverables | Notes |
|---|---|---|---|---|
| Routine / Biannual | Spring and fall | Visual | Condition report, photos, annotated roof plan | Satisfies maintenance warranty requirements |
| Post-Storm / Damage | Within 48–72 hours of event | Visual + drone | Damage map, photo log, repair estimate | Critical for insurance documentation; time-sensitive |
| Pre-Purchase / Due Diligence | Before closing or financing | Visual + IR + core sampling | Full condition report, moisture map, lab results | Lenders and buyers should require IR and cores |
| Warranty Compliance | Per manufacturer schedule | Visual per manufacturer template | Completed manufacturer form, signed certification | Required to keep manufacturer warranty active |
| Emergency Triage | Immediately after active leak | Visual + moisture probe | Temporary repair scope, priority findings | Focused on stopping damage, not full assessment |
According to industry guidance, a complete commercial roof inspection program combines all five types across a building’s life cycle. Routine and warranty inspections keep the roof documented; pre-purchase and post-storm inspections protect financial transactions and insurance claims. Specifying the type in writing before you hire an inspector prevents scope creep and missing tests.
How often should you inspect a commercial roof?
The short answer: twice a year, every year, plus after any significant weather event. That biannual cadence aligns with NRCA and IIBEC guidance and is the baseline most manufacturers require to keep warranties valid.
Frequency adjusts based on roof system and age:
- Metal roofing: — Annual visual inspection focused on fasteners, seams, and penetration flashings. Thermal cycling loosens fasteners faster in climates with wide temperature swings.
Event-driven rules matter just as much as the calendar. Schedule a post-storm inspection within 48–72 hours of any hurricane, hail event, or high-wind episode. That window is critical for insurance documentation. Waiting longer gives insurers grounds to argue that damage predated the storm.
Pro Tip: In Florida and other Gulf Coast markets, schedule your annual or biannual inspection in March or April, before hurricane season opens June 1. That timing gives you a clean condition baseline and time to complete any repairs before peak storm risk.
For more on building a year-round maintenance schedule, the commercial roof maintenance guide from Hytzroofing covers cadence planning in detail.
How do you prepare for a commercial roof inspection?
Good preparation cuts inspection time, improves report accuracy, and protects you if you need to file a claim later. Gather these records before the inspector arrives:
- Construction and as-built drawings showing roof assembly layers, drain locations, and penetration details
- Warranty documents for the membrane, insulation, and any roof-mounted equipment
- Prior inspection reports and repair invoices going back at least five years
- Equipment location maps for HVAC units, solar arrays, exhaust fans, and any recent additions
- Manufacturer maintenance logs if your warranty requires documented service intervals
Safety planning is non-negotiable. Confirm the inspector has a written fall-protection plan, appropriate personal protective equipment, and a clear roof-access method (ladder, roof hatch, or elevated work platform). Restrict access to fragile or suspect areas until the inspector has assessed them visually from a safe position.
Before the inspector shows up, ask these questions directly:
- What credentials do you hold? (IIBEC RRC/RRO, HAAG Certified Inspector, InterNACHI, or manufacturer certification)
- Are you licensed and insured in this state? Can you provide a certificate of insurance?
- What is included in the inspection scope, and what costs extra?
- Can you provide a sample report from a comparable property?
- Do you offer infrared scanning, core sampling, or nuclear moisture testing, and what conditions are required?
The U.S. General Services Administration publishes procurement and facility evaluation guidance that public-sector owners can use as a template for writing formal inspection scopes of work. Private owners benefit from the same discipline: put the scope in writing before signing any inspection agreement.
What does the step-by-step commercial roof inspection process look like?
A thorough commercial roofing assessment follows a consistent sequence. Skipping steps or reversing the order produces gaps that weaken the final report.
Step 1: Interior and attic review
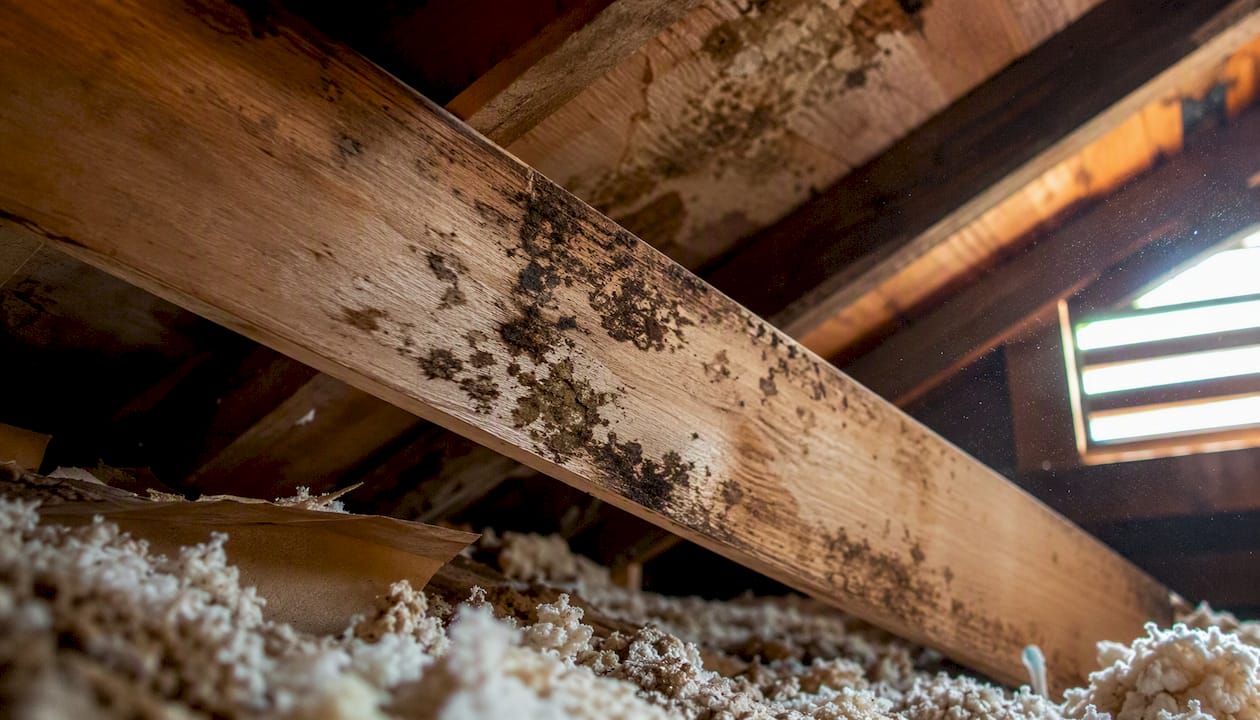
Start inside. Look for water stains on ceilings and walls, active drips or efflorescence, and any visible mold or mildew. Check insulation condition in accessible attic or plenum spaces. Wet or compressed insulation signals moisture infiltration that may not yet be visible from the roof surface. Note vapor barrier integrity and any signs of structural deflection in the deck.
Step 2: Perimeter and edge details
Move to the roof exterior and start at the perimeter. Inspect parapet walls, coping caps, and edge metal for gaps, rust, or separation. Edge failures are among the most common entry points for water, and they are easy to miss if you go straight to the field membrane.
Step 3: Field membrane and surface condition
Walk the roof field in a systematic grid pattern. Look for blisters, ridging, alligatoring, punctures, and areas of standing water or ponding. On single-ply systems, check seam integrity and any areas of membrane shrinkage. On BUR systems, look for exposed aggregate loss and surface erosion.
Step 4: Penetrations and flashings
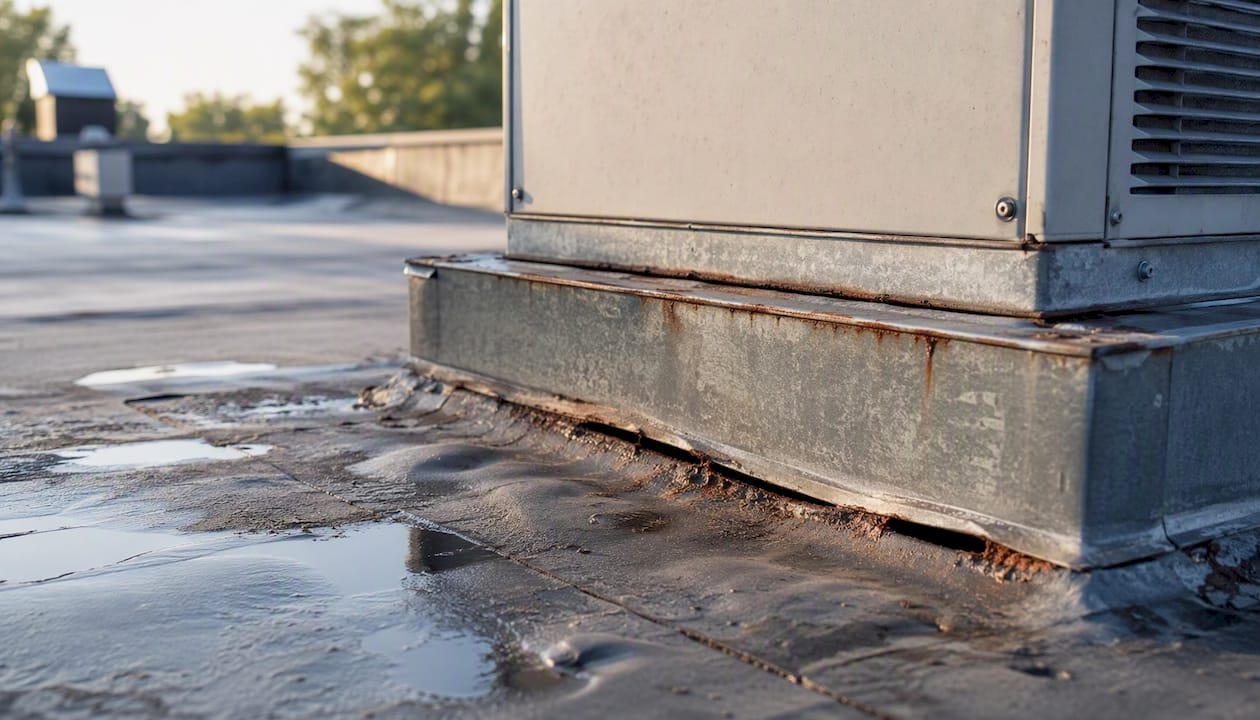
Every pipe, conduit, curb, and HVAC unit is a potential leak point. Inspect the flashing at each penetration for cracking, separation, or improper termination. Pitch pockets should be filled flush with no voids. Curb flashings on HVAC units are a frequent failure point on flat roofs, especially after equipment has been serviced or replaced.
Step 5: Drainage systems
Check every drain, scupper, and gutter for debris, proper slope, and secure attachment. Blocked drains cause ponding, which accelerates membrane deterioration and adds structural load. Confirm that drain strainers are in place and that overflow scuppers are clear.
Step 6: Roof-mounted equipment bases
Inspect the bases and curbs of all rooftop equipment. Look for movement, cracking at the base flashing, and any signs of vibration damage to the surrounding membrane. Equipment that has been recently serviced or repositioned should receive extra scrutiny.
Which diagnostic tests go beyond a visual inspection?
Visual inspection finds what is visible. Three additional methods find what is hidden: infrared thermography, core sampling, and nuclear moisture testing. Each has a specific role, and using them in the right sequence saves money.
Infrared thermography
Infrared (IR) scanning detects temperature differences in the roof assembly caused by trapped moisture. Wet insulation retains heat longer than dry insulation after sunset, creating a thermal signature the camera captures. For accurate results:
- Schedule after at least 48 hours of dry weather
- Conduct the scan at dusk or after dark when the thermal contrast between wet and dry areas is greatest
- Avoid scanning on windy or overcast days, which reduce surface temperature differentials
IR is a mapping tool, not a verdict. It identifies probable moisture locations to target with cores. Treating an IR scan as definitive proof of moisture without confirmation is a common and costly mistake.
Core sampling
Core sampling is the definitive diagnostic. A 2–3 inch core pulled from the roof assembly reveals membrane adhesion, insulation condition and R-value, moisture content, and deck condition. Inspectors typically take 3–5 cores per distinct roof section, placing them in both suspect areas (flagged by IR) and control areas (visually clean zones) for comparison. Each core location must be GPS-documented and patched immediately to restore membrane watertightness. When lab analysis is required, chain-of-custody documentation and retained samples are standard.
Core sampling is recommended for pre-purchase due diligence, any situation where IR suggests significant moisture, and when you need to determine whether a roof-over solution is feasible.
Nuclear moisture testing
Nuclear moisture testing uses a low-level radioactive source to measure hydrogen content in the roof assembly, which correlates to moisture. It is non-destructive and covers large areas quickly using a grid pattern. The trade-off: it requires a licensed operator, involves regulatory handling requirements, and is less precise in identifying exact moisture boundaries than IR combined with cores.
Pro Tip: Use this sequence: visual first, IR to map suspect zones, then cores in flagged and control areas. Nuclear testing is best reserved for large flat roofs where you need to quantify total moisture volume before deciding between repair and replacement.
| Method | Destructive? | Best Use Case | Key Limitation |
|---|---|---|---|
| Visual inspection | No | Baseline condition, all inspection types | Cannot detect subsurface moisture |
| Infrared thermography | No | Moisture mapping, pre-purchase, post-storm | Requires dry conditions; results need core confirmation |
| Core sampling | Yes (patched) | Confirming moisture, pre-purchase, roof-over feasibility | Limited sample points; lab fees add cost |
| Nuclear moisture testing | No | Large-area moisture quantification | Requires licensed operator; regulatory handling |
How do you choose a qualified commercial roof inspector?
Credentials matter because they determine what the inspector can actually do and what their report is worth to your insurer or manufacturer.
Credentials to look for:
- IIBEC RRC (Registered Roof Consultant) or RRO (Registered Roof Observer): The highest independent credentials in commercial roofing. An RRC is qualified to perform full condition assessments and write specifications; an RRO is qualified to observe and document. Both are recognized by insurers and lenders.
- HAAG Certified Inspector (HCI): Widely recognized for storm and hail damage assessments; often required by insurance adjusters.
- InterNACHI certification: Recognized for general inspection scope and standards of practice.
- Manufacturer certification (e.g., GAF Certified™ Commercial Contractor): Required for warranty compliance inspections on manufacturer-specific systems.
- PE-stamped engineer letter: Required for structural assessments, litigation support, or lender-required due diligence on large transactions.
Questions to ask before hiring:
- Can you provide a sample report from a similar commercial property?
- Are you licensed and insured in Florida (or your state)? Can you provide a certificate of insurance today?
- Do you have a financial interest in the repair or replacement work that follows this inspection?
- What diagnostic capabilities do you offer in-house (IR, core, nuclear), and which do you subcontract?
- What is your turnaround time for the written report?
Red flags to watch for:
- A one-page report with no photos and no location references
- Refusal to provide GPS coordinates or an annotated roof plan
- An inspector who offers a “free inspection” and immediately recommends full replacement without any diagnostic evidence
- No credentials beyond a general contractor’s license
- Inability to explain the difference between a maintenance inspection and a due-diligence inspection
The conflict-of-interest question is the most important one. An inspector who also sells the replacement job has a financial incentive to find problems. That does not mean contractor-inspectors are untrustworthy, but you should understand the relationship and, for large transactions, consider hiring an independent IIBEC-credentialed consultant.
What does a commercial roof inspection cost?
Costs vary by roof size, complexity, access requirements, and the diagnostic methods included. Here are realistic ranges based on industry standards:
| Inspection Type | Typical Cost Range | Time on Site |
|---|---|---|
| Walk-on visual inspection | $150–$400 | 1–3 hours |
| Drone-only visual | $200 | 1–2 hours |
| Visual + infrared (IR) add-on | $400–$900 | 2–4 hours |
| Visual + IR + core sampling (3–5 cores) | $600–$1,500+ | 3–6 hours |
| Nuclear moisture testing (large roof) | $800 | 4–8 hours |
| PE-stamped engineer letter | $500 | Varies |
A standard commercial inspection runs $150–$650 depending on scope and add-ons. Larger roofs, complex parapet systems, multiple HVAC units, and required lab analysis all push costs higher.
When reviewing a quote, look for these line items:
- Base inspection fee (square footage or flat rate)
- IR scanning fee (often priced per square foot or per scan session)
- Core sampling fee per core, plus lab analysis if required
- Report preparation fee (some contractors bundle this; others charge separately)
- Travel or mobilization fee for remote properties
For help reading contractor estimate line items, the roofing estimate guide from Hytzroofing breaks down what each line means and what to negotiate.
What should you do after the inspection?
The report is not the finish line. It is the starting point for decisions. Here is how to turn findings into action:
Triage by severity timeline:
- Immediate (within 7 days): Active leaks, structural compromise, or any finding rated “Immediate” in the report. Delay risks interior damage and may void your insurance coverage if you knew about the defect and did not act.
- 30-day window: Major defects with no active leak but high failure risk before the next weather event. Schedule repairs and get contractor quotes within two weeks.
- Annual maintenance cycle: Minor defects that are documented and stable. Include in your next maintenance budget cycle.
- Monitor: Document the condition with photos and re-inspect at the next scheduled interval.
For warranty claims:
- Pull the warranty document and confirm the claim filing window (most manufacturer warranties require notice within 30–90 days of discovery).
- Submit the inspection report, photos, and GPS coordinates to the manufacturer’s warranty department.
- Request the manufacturer’s own inspection template if they require it; some manufacturers send their own inspector before approving a claim.
- Keep copies of all correspondence and document every communication with dates.
For insurance claims:
Follow the same documentation discipline. Submit the post-storm inspection report within the insurer’s required window (typically 30–60 days after the event). For storm damage specifically, the storm damage repair guide from Hytzroofing covers the full insurance workflow in detail.
For capital planning: Fold the inspection findings into a 1-year, 3-year, and 5-year capital expenditure forecast. A roof with multiple “Major” findings and an age over 15 years is a replacement candidate in the 3-year window. A roof with only “Monitor” findings and a recent warranty is a maintenance budget item.
Why do contractor credentials matter for inspections?
Manufacturer certifications and recognized credentials are not just marketing badges. They determine whether your inspection report is accepted by your insurer, your lender, or your manufacturer’s warranty department.
An IIBEC RRC or RRO credential means the inspector has passed rigorous testing on roofing science, building enclosure principles, and professional ethics. HAAG certification is the standard insurers recognize for storm and hail damage. InterNACHI’s Standards of Practice define the minimum scope a general inspection must cover. ASTM International publishes the material test methods that underpin diagnostic testing, from membrane tensile strength to insulation moisture content. FM Global loss-prevention standards govern how roofing assemblies are tested and rated for wind and fire resistance, which matters for commercial properties with FM-rated systems.
Hytzroofing holds GAF Master Elite® Contractor status, earned by fewer than 2% of roofing contractors across North America, and GAF Certified™ Commercial Contractor status for flat and low-slope systems. Every project is backed by Florida Contractor License #CCC1332551, BBB Accreditation with an A+ rating, full general liability insurance, and workers’ compensation coverage. The GAF President’s Club Award and the 2024 Brava Roof Tile Excellence Award reflect a track record that goes beyond minimum certification.
Pro Tip: For routine maintenance inspections, a GAF Certified™ Commercial Contractor is often the right choice because they can document findings in a format the manufacturer accepts for warranty compliance. For pre-purchase due diligence or litigation support, pair a contractor inspection with an independent IIBEC RRC report.
When a PE-stamped engineer letter is required (lender due diligence, structural concerns, or legal proceedings), request it as a separate deliverable from a licensed structural or roofing engineer. A contractor certification alone does not substitute for a PE stamp in those contexts.
Key Takeaways
A professional commercial roof inspection follows a defined sequence from records review through targeted diagnostics to a photo-backed report, and the documentation it produces is what protects your warranty, insurance claim, and capital plan.
| Inspect at least twice a year | Schedule spring and fall inspections, with an additional inspection within 48–72 hours after significant storms. | Require GPS-tagged photos and a full report | A professional report runs 8–25 pages with 20–60 photographs; anything shorter may not meet insurance or warranty requirements. | | Match diagnostics to the situation | Add IR scanning for pre-purchase or post-storm; follow with 3–5 cores per section to confirm moisture before committing to replacement. | | Vet credentials before hiring | Look for IIBEC RRC/RRO, HAAG, or manufacturer certification; ask for a sample report and a certificate of insurance upfront. | | Hytzroofing for certified inspections | Hytzroofing holds GAF Certified™ Commercial Contractor status and Florida License #CCC1332551, with inspection reports accepted for warranty and insurance documentation. |
The part of commercial roof inspections most owners get wrong
There is a persistent assumption that a roof inspection is a pass/fail event. You hire someone, they walk the roof, they tell you it is fine or it needs work. That framing leads to bad decisions.
The real value of a commercial roofing assessment is the documentation trail it builds over time. A single inspection tells you the current condition. A series of inspections, each with GPS-tagged photos and consistent severity ratings, tells you the rate of deterioration. That trajectory is what separates a smart capital replacement decision from a reactive emergency replacement that costs twice as much and happens at the worst possible time.
The second mistake is treating infrared thermography as a verdict rather than a map. IR is genuinely useful, but it is a screening tool. Owners who see a thermal anomaly and immediately authorize a full roof replacement without pulling cores are spending money on a diagnosis they have not actually confirmed. The right sequence is IR to map, cores to confirm, then a repair-versus-replace decision based on actual moisture volume and deck condition.
The third mistake is the conflict-of-interest blind spot. A contractor who inspects your roof and then quotes the repair has a financial stake in the findings. That does not make them dishonest, but it does mean you should understand the relationship. For any project over a certain dollar threshold, or for a pre-purchase transaction, an independent IIBEC-credentialed consultant is worth the additional cost. Their report carries weight that a contractor’s self-generated inspection does not.
The owners who get the most value from inspections are the ones who treat them as a management tool, not a compliance checkbox. They schedule consistently, they read the reports carefully, and they use the findings to negotiate better warranty terms, file stronger insurance claims, and plan replacements before they become emergencies.
Hytzroofing offers certified commercial roof inspections in Tampa Bay
If your commercial property needs a certified inspection backed by manufacturer credentials and full insurance documentation support, Hytzroofing is a qualified option in Tampa Bay and Central Florida.
Hytzroofing holds GAF Certified™ Commercial Contractor status and GAF Master Elite® designation (earned by fewer than 2% of contractors in North America), which means inspection reports are formatted to satisfy GAF warranty compliance requirements. Every inspection is performed under Florida Contractor License #CCC1332551 with full general liability and workers’ compensation coverage. The team offers visual inspections, infrared scanning, core sampling, and insurance claim documentation support.
For property managers dealing with an active leak or an upcoming lease renewal, the commercial roofing services page has full details on inspection scope and how to request a sample report. You can also reach out directly to schedule an inspection or ask about post-storm emergency response.
Useful sources for commercial roof inspection standards
Attach these references to your inspection work orders when you need specific testing formats or reporting standards:
- Commercial Roof Inspection Guide (2026) | Commercial Roof Guide
- The importance of a roof inspection (GAF)
- How to Perform Roof Inspections — InterNACHI (PDF)
- 30-Point Roof Inspection Checklist (Free PDF) | TRB
- The basics of a roof inspection | Rimkus
- ASTM International
When you issue an inspection work order, attach the relevant standard by name and number. Specifying “ASTM D7234 for core adhesion testing” or “InterNACHI SOP for inspection scope” gives the inspector clear deliverable expectations and gives you grounds to dispute a report that falls short.
FAQ
How often should a commercial roof be inspected?
At minimum, inspect twice per year (spring and fall), plus within 48–72 hours after significant storms. For roofs older than 15 years, add a third mid-year check.
What is the difference between a routine inspection and a due-diligence inspection?
A routine inspection documents current condition and maintenance needs. A due-diligence inspection, used for property transactions or underwriting, adds infrared scanning and core sampling to verify moisture content and assembly composition.
How much does a commercial roof inspection cost?
A standard visual inspection runs $150–$400. Adding infrared scanning brings the total to $400–$900, and including core sampling can push costs to $600–$1,500 or more depending on roof size and the number of cores required.
What credentials should a commercial roof inspector have?
Look for IIBEC RRC or RRO for independent consultant-level work, HAAG certification for storm damage, and manufacturer certification (such as GAF Certified™ Commercial Contractor) for warranty compliance inspections.
Can Hytzroofing perform certified commercial roof inspections in Florida?
Yes. Hytzroofing holds GAF Certified™ Commercial Contractor status and operates under Florida Contractor License #CCC1332551, with inspection reports formatted to support GAF warranty compliance and insurance claim documentation.
Recommended
- Why Commercial Roofs Need Inspections: A Property Manager’s Guide | Hytz Roofing
- Preventive Roof Maintenance: A Property Owner’s Guide | Hytz Roofing
- Commercial Roof Insulation: What Every Building Owner Should Know | Hytz Roofing
- Roof Replacement Steps Homeowners Expect: Clear Guide | Hytz Roofing
Related Hytz Roofing Services