TPO Roof Problems: What Property Owners Should Do
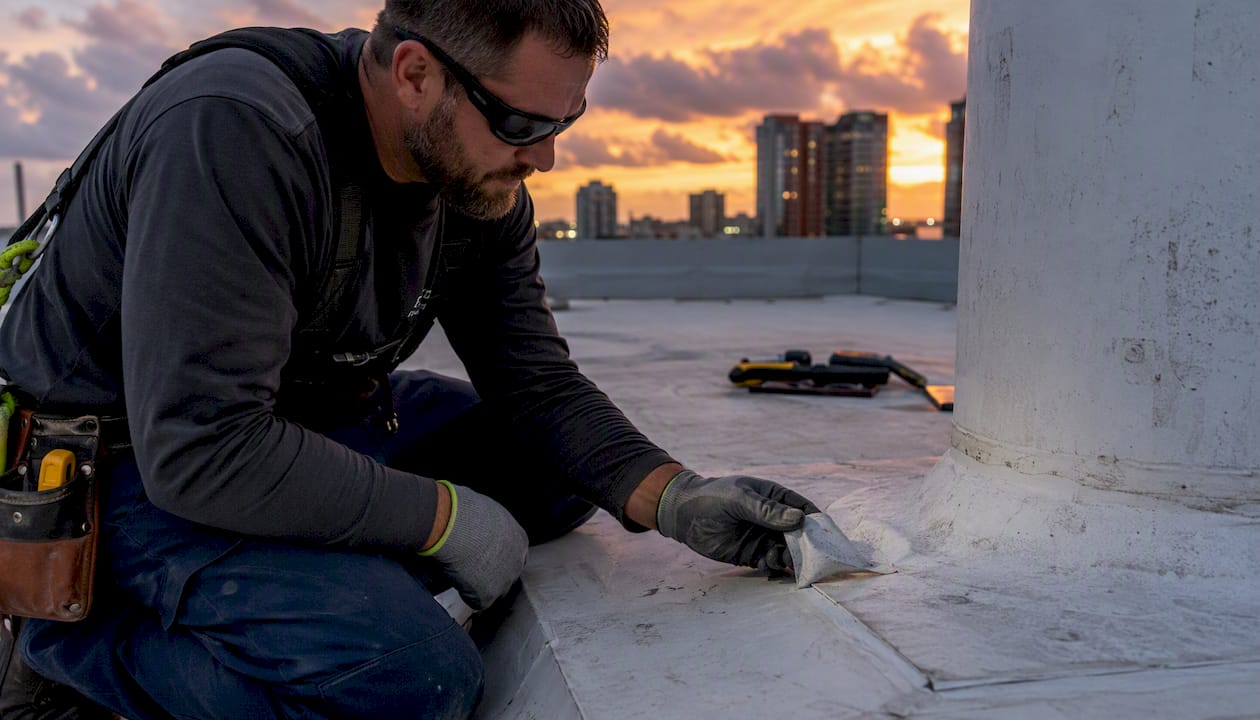
The most common TPO roof problems are seam failures, punctures and tears, ponding water, UV-induced crazing and cracking, blistering or lifting membrane, and shrinkage. If you’re dealing with an active leak right now, your first three moves are simple: photograph everything, move interior assets away from the wet area, and call a licensed roofing contractor to schedule a professional inspection with seam testing. Do not wait to see if it dries out on its own.
Here’s a quick look at what you’re likely dealing with:
- Seam failure: Open or delaminated seams, often visible as lifted edges or water tracking along a lap joint
- Punctures and tears: Foot traffic, dropped tools, or HVAC equipment creating holes in the field membrane
- Ponding water: Standing water that remains 48 hours or more after rain, accelerating membrane wear
- UV/heat degradation: Surface crazing, chalking, or cracking, especially on south-facing or low-slope sections
- Blistering and lifting: Air or moisture trapped beneath the membrane causing bubbles or lifted sections
- Shrinkage: Membrane pulling away from perimeter flashings or penetrations, creating open gaps
🚨 If you have an active leak: Cover exposed interior equipment, document with photos and video, and contact a licensed contractor immediately. In Tampa Bay, emergency roof repair is available around the clock.
Pro Tip: Schedule your professional inspection before hurricane season, not after. The WSRCA and Building Enclosure research both confirm that field-aged TPO roofs most often fail at localized details, which a qualified inspector can catch and fix for a fraction of the cost of emergency repairs.
Key Takeaways
TPO membrane failures most often start at localized details like seams, flashings, and penetrations, and a professional peel test is the single most reliable indicator of whether repairs will hold or replacement is the right call.
| Point | Details |
|---|---|
| Peel test determines repairability | A ply-to-ply failure means the membrane is weldable; a clean peel means the weld window has closed and repairs are likely temporary. |
| 45-mil vs. 60-mil warranty gap | 45-mil systems commonly carry shorter warranties (~10 years); 60-mil systems often carry longer coverage (~20 years) and suit Florida’s UV conditions better. |
| Inspect twice a year plus after storms | Biannual inspections and post-storm checks catch localized failures before they become system-wide problems. |
| WSRCA data shows real UV risk | Exposed TPO showed a roughly 20–26% thickness reduction and ~91% elongation loss, confirming that Florida’s UV load accelerates embrittlement. |
| Hytzroofing for Tampa Bay TPO | Hytzroofing provides forensic peel testing, documented inspection reports, and full TPO repair or replacement with manufacturer-backed warranties in Tampa Bay. |
Table of Contents
- 2. What are the most common TPO roof problems and how do you fix them?
- 3. How do you decide between repairing and replacing a TPO roof?
- 4. What does a good TPO inspection and maintenance schedule look like?
- 5. What should you ask a contractor before hiring them for TPO work?
- 6. What does the research say about TPO repair reliability?
- 7. TPO roof problems can create serious safety hazards
- 8. What I see on Tampa Bay TPO roofs every season
- Hytzroofing handles TPO inspections, repairs, and replacements in Tampa Bay
- Sources
- FAQ
2. What are the most common TPO roof problems and how do you fix them?
Understanding each failure mode helps you decide how urgent the repair is and what kind of contractor scope to expect. Industry field reviews consistently identify seam integrity and detailing as the primary drivers of TPO membrane failures, not the membrane material itself.
Punctures and tears
Cause: Foot traffic from HVAC technicians, dropped tools, or sharp debris driven by wind. Florida’s hurricane season makes wind-borne punctures especially common.
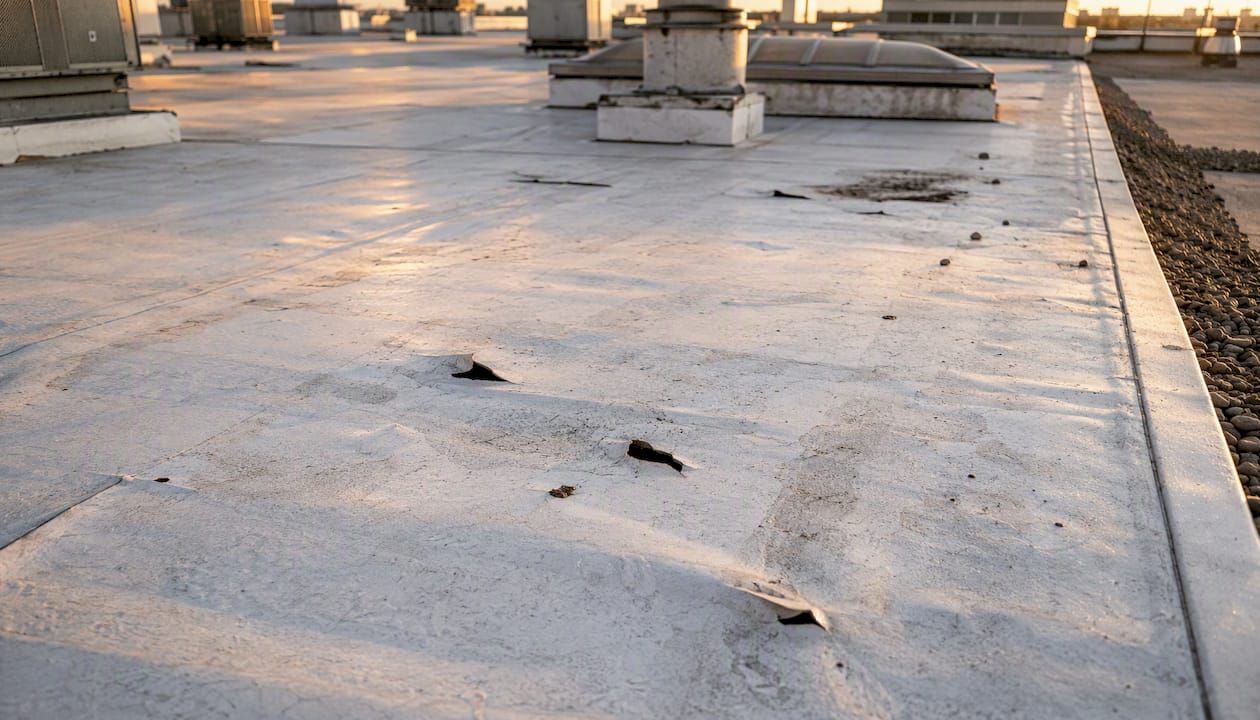
Signs: Visible holes, cuts, or abraded spots in the field membrane. Sometimes you’ll see interior staining directly below the damage.
Repair: A compatible TPO patch, heat-welded in place, works well for localized punctures on membranes that are not heavily oxidized. The patch must extend at least 6 inches beyond the damage on all sides. On aged membranes, confirm weldability first with a peel test before committing to a patch repair.
Seam failures
Cause: Poor installation technique, inadequate heat during welding, or membrane oxidation that prevents true molecular fusion. Many seam failures trace back to workmanship shortcuts at the time of installation.
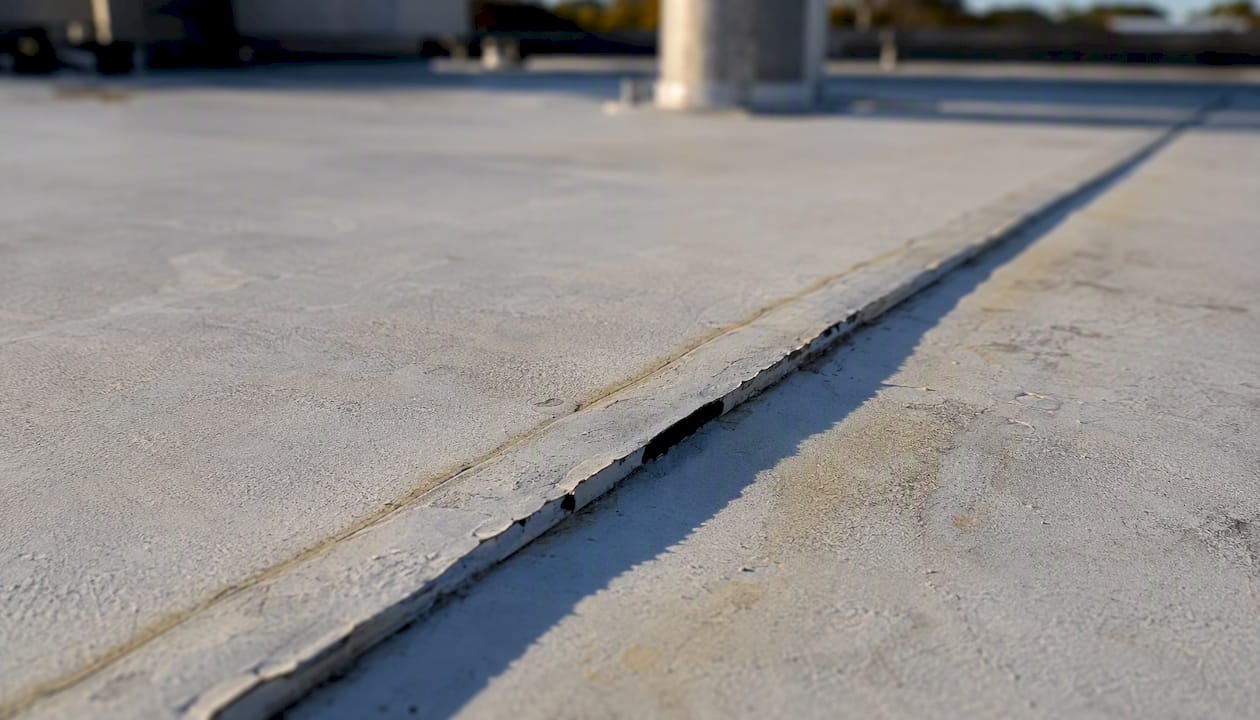
Signs: Lifted or open lap edges, water tracking along seam lines, or visible separation when you probe a seam with a dull tool. A contractor should perform a peel test: a properly welded seam tears the membrane (ply-to-ply failure) rather than peeling cleanly apart. CIB W83 guidance is clear that a clean peel indicates inadequate bond strength and predicts premature failure under dynamic loads.
Repair: Re-welding open seams works on younger membranes where the surface can still fuse. On oxidized membranes (typically 7–10 years of exposure or more), re-welding produces only a mechanical bond that is likely to delaminate. In those cases, seam replacement or full membrane recovery is the more reliable path.
Ponding and standing water
Cause: Inadequate roof slope, clogged drains or scuppers, or improper tapered insulation. Ponding is almost always a design or substrate problem, not a membrane defect on its own.
Signs: Visible water rings or algae staining after rain dries. Water that sits for more than 48 hours after a storm is the standard threshold for concern.
Repair: Clear drains and scuppers as an immediate step. Long-term, the fix usually involves adding tapered insulation to redirect water, re-sloping the deck, or installing additional drains. Patching the membrane without addressing drainage is a temporary measure at best.
💧 Ponding water accelerates membrane degradation and puts added stress on seams and flashings. Contractor guidance consistently identifies it as a compounding failure factor, not a standalone problem.
UV and heat degradation (crazing and cracking)
Cause: Prolonged UV exposure and thermal cycling break down the membrane’s polymer chains over time. In Tampa Bay’s climate, this process is faster than in northern markets because of year-round UV loading and high surface temperatures.
Signs: Surface crazing (a network of fine cracks), chalking, discoloration, or visible brittleness near seams and perimeter edges. WSRCA field and lab analysis found exposed TPO samples with measurable surface crazing, a roughly 20–26% reduction in membrane thickness over the scrim, and a large drop in elongation, all evidence that prolonged UV weathering can embrittle the membrane.
Repair: Localized crazing can sometimes be addressed with compatible coatings, but widespread embrittlement usually signals that the membrane has passed its reliable service life. A forensic peel test is the right next step before spending money on coatings.
Blistering and lifting
Cause: Air or moisture trapped between the membrane and the substrate during installation, or moisture that has migrated into the insulation over time. Recovery installs over saturated substrates are a common source of this problem.
Signs: Raised bubbles or soft spots in the membrane field. Small blisters that are stable and dry inside may not be immediately urgent. Large or growing blisters, or those that contain water, need prompt attention.
Repair: Small, dry blisters can sometimes be slit, dried, and patched. Wet blisters require removing the affected section, drying or replacing saturated insulation, and installing new membrane. Installing new TPO over trapped moisture without addressing the substrate is a known cause of premature failure.
Shrinkage
Cause: Thermal cycling causes the membrane to contract over time. Improper fastening or adhesion at installation accelerates this. Shrinkage is most visible at perimeter edges and around penetrations.
Signs: Membrane pulling away from edge metal, flashings, or pipe boots. Open gaps at the perimeter are a direct leak path.
Repair: Re-flashing the affected perimeter sections and securing the membrane edge. Edge metal detailing matters here: installing membrane first and then attaching metal over it reduces perimeter leak risk compared with lower-quality install sequences.
Severity and repair method summary:
| Problem | Severity | Repair Method | When Replacement Is Likely |
|---|---|---|---|
| Punctures/tears | Localized | Compatible TPO patch, heat-welded | Widespread field damage or oxidized membrane |
| Seam failures | Localized to system-wide | Re-weld or seam replacement | Failed peel test, oxidized surface |
| Ponding water | System-wide (design issue) | Tapered insulation, drain addition | Membrane degraded from prolonged saturation |
| UV/heat crazing | System-wide | Coatings (limited); forensic test first | Embrittlement confirmed by peel test |
| Blistering/lifting | Localized to widespread | Patch dry blisters; replace wet sections | Saturated insulation across large area |
| Shrinkage | Perimeter/localized | Re-flash, secure edge | Widespread pulling at multiple perimeters |
3. How do you decide between repairing and replacing a TPO roof?
The repair-vs-replace decision comes down to five factors: membrane age, the percentage of roof area affected, whether the membrane can still be welded, insulation condition, and warranty status. Getting this wrong in either direction costs money. Patching a membrane that has passed its weld window wastes repair dollars. Replacing a roof that only needs targeted seam work is an unnecessary capital expense.
Decision checklist:
- Membrane age and thickness: A 45-mil TPO commonly carries a shorter product warranty than a 60-mil system, which often carries a longer warranty period, and industry lifespan guidance puts well-installed TPO at roughly 15–25 years in moderate climates. In Florida’s UV environment, expect the lower end of that range for 45-mil systems.
- Area affected: Damage covering less than roughly 10% of the roof area is generally a repair candidate. Widespread failures across multiple zones push toward recovery or full replacement.
- Peel test result: This is the single most important field test. A ply-to-ply failure (the membrane tears) means the surface can still fuse and repairs will hold. A clean peel means the weld window has closed and any new welds will be mechanical bonds prone to delamination. Forensic reporting describes this oxidation-driven closure as occurring after roughly 7–10 years of exposure in some membranes.
- Insulation saturation: Wet insulation under the membrane must be replaced regardless of what the membrane looks like. A moisture scan (infrared or nuclear) before any repair decision is money well spent.
- Warranty status: Check whether the manufacturer warranty is still active and whether a repair will void it. Some warranties require manufacturer-approved materials and certified installers for repairs to remain valid.
Indicative cost and timeline guidance:
Localized patch repairs for punctures or small seam sections typically run in the range of a few hundred to low thousands of dollars and can often be completed in a single day. Larger seam replacement or re-flashing scopes run higher and may take two to three days depending on roof size. Full TPO replacement on a commercial flat roof is a multi-day project with costs that scale significantly by square footage, membrane thickness, and substrate condition. Recovery (overlay) systems sit between repair and full replacement in cost, but require careful substrate evaluation: installing new TPO over trapped moisture or uneven surfaces causes blisters, fastener issues, and early failure.
| Scenario | Area Affected | Repair Method | Est. Remaining Life After Repair | Warranty Outcome |
|---|---|---|---|---|
| Single puncture, young membrane | Localized (<10%) | TPO patch, heat-welded | Near full remaining life | Manufacturer warranty typically preserved |
| Open seams, membrane weldable | Localized to moderate | Re-weld or seam replacement | 5–10 years depending on membrane age | Installer labor warranty applies |
| Ponding with membrane wear | System-wide | Tapered insulation + membrane repair | Depends on drainage fix quality | May require manufacturer review |
| Embrittled membrane, failed peel test | System-wide | Full replacement or recovery with cover board | 15–25 years (new system) | New manufacturer + installer warranty |
| Saturated insulation | Widespread | Full tear-off and replacement | 15–25 years (new system) | New manufacturer + installer warranty |
4. What does a good TPO inspection and maintenance schedule look like?
The simplest way to avoid expensive TPO membrane failures is a consistent inspection routine. Building Enclosure research confirms that field-aged TPO roofs most often show localized detailing or maintenance issues rather than uniformly failed membranes, which means biannual inspections plus post-storm checks catch the majority of problems before they escalate.
Recommended schedule:
- Spring inspection (pre-hurricane season): Check seams, perimeter flashings, pipe boots, and edge metal. Clear all drains and scuppers. Document with photos.
- Fall inspection (post-hurricane season): Assess any storm-related punctures, lifted flashings, or debris damage. Check for new ponding patterns.
- After any significant storm: Walk the roof or hire a contractor to check for wind-driven punctures, displaced flashings, and clogged drains. In Tampa Bay, this means after any named storm or severe weather event.
- After HVAC or equipment service: Confirm no new punctures or foot-traffic damage near rooftop units. Map HVAC exhaust and grease-trap locations and monitor those zones closely, since hydrocarbon and grease exposure can create localized membrane deterioration that accelerates faster than UV damage alone.
What to check and document during each inspection:
- Seam condition along all lap joints (probe with a dull tool; look for lifting or separation)
- Perimeter edge metal and flashings (check for gaps, rust, or membrane pullback)
- All drains, scuppers, and gutters (clear debris, confirm positive flow)
- Penetrations: pipe boots, HVAC curbs, skylights (look for open gaps or cracked sealant)
- Field membrane surface (look for crazing, blistering, or discoloration)
- Interior ceiling and walls below the roof (water staining is often the first sign of a slow leak)
Maintenance actions that reduce failure risk:
- Keep drains and scuppers clear year-round, not just at inspection time
- Install walk pads on any traffic routes to HVAC units
- Require photographic documentation and a written report from every contractor who works on the roof
- For high-UV or heavy-traffic applications, specify 60-mil membrane at replacement rather than 45-mil
- Consider protective cover boards on new installs to extend membrane life and improve puncture resistance
Pro Tip: Keep a roof log: a simple folder (paper or digital) with dated photos, contractor reports, and repair receipts. This documentation supports insurance claims, warranty disputes, and CapEx planning, and it’s the first thing a forensic inspector will ask for.
See Hytzroofing’s preventive roof maintenance guide for a full property-owner checklist, and the commercial roof inspection process guide for what a professional on-roof inspection covers step by step.
5. What should you ask a contractor before hiring them for TPO work?
Not every roofer who says they work with TPO has the experience to do it correctly. Seam welding requires calibrated equipment, proper technique, and material knowledge. A contractor who cuts corners on seam testing or uses incompatible primers can create failures that are worse than the original problem.
Questions to ask every bidder:
- Do you perform peel tests during and after installation or repair? Can you show me the results?
- What is your Florida contractor license number? (Verify it at the Florida DBPR before signing anything.)
- What manufacturer warranty will this repair or replacement carry, and what are the conditions that could void it?
- Do you carry general liability and workers’ compensation insurance? Can you provide certificates?
- What is your labor warranty, and what does it cover?
- Have you worked on TPO systems of this age and thickness before? Can you provide references from similar jobs?
- If you’re recommending a recovery (overlay) system, how will you assess the substrate for moisture before installing?
Red flags to watch for:
- Refuses to perform or discuss seam testing
- Recommends a blanket coating or patch without any moisture or peel testing
- Cannot provide a Florida contractor license number or proof of insurance
- Proposes a recovery install without a moisture scan of the existing substrate
- Uses incompatible coatings or primers not approved by the membrane manufacturer
- Offers a verbal-only scope with no written documentation or post-repair inspection report
What a credible proposal should include:
- Photographic documentation of existing conditions before work begins
- Moisture scan results if saturation is suspected
- A drainage plan if ponding is identified
- Manufacturer-approved materials and primers specified by name
- A written labor warranty with clear terms
- A post-repair inspection report with photos confirming seam integrity
Pro Tip: Ask to see a sample peel-test result from a recent job. A contractor who routinely tests seams will have this on hand. One who hesitates is telling you something important.
Understanding how to read a roofing estimate line by line helps you compare bids and spot scopes that are missing critical items.
6. What does the research say about TPO repair reliability?
The most important technical concept for any property owner managing a TPO roof is the Weld Window. It is not a marketing term. It is a material-science phenomenon with direct consequences for whether your repair dollars will hold.
Here is how it works: TPO membranes fuse through heat welding, which creates molecular interlinking between polymer chains at the seam interface. As the membrane ages and oxidizes from UV exposure, polymer chain scission degrades the surface layer. Once that degradation crosses a threshold, the surface can no longer achieve true molecular fusion during hot-air welding. Forensic reporting in Roofing Contractor describes this as the Weld Window closing, typically after roughly 7–10 years of exposure in some membranes. Attempted heat-weld repairs after that point produce mechanical bonds that are prone to delamination under thermal cycling and wind uplift.
The WSRCA bulletin adds quantitative weight to this concern. Field and lab analysis found exposed TPO samples with surface crazing, a roughly 20–26% reduction in membrane thickness over the scrim, and a large reduction in elongation compared to unexposed samples. That elongation loss is the physical signature of embrittlement: a membrane that cannot flex will crack under stress rather than stretch.
| Test or Finding | What It Measures | What the Result Tells You |
|---|---|---|
| Peel/ply-to-ply weld test | Bond quality at a seam | Ply-to-ply tear = weldable; clean peel = weld window closed |
| Membrane thickness measurement | UV/weathering-driven thickness loss | 20–26% reduction over scrim indicates significant degradation |
| Elongation test | Membrane flexibility remaining | large reduction in exposed vs. unexposed samples signals embrittlement |
| Surface crazing inspection | Visual oxidation indicator | Crazing near seams predicts weld failure and leak risk |
“A true fusible weld should produce a film-tearing failure during a peel test. A clean peel indicates inadequate bond strength and predicts premature seam failure under dynamic loads.” CIB W83 TPO Roof Membranes: Historical Perspectives and Guidelines
Practical takeaways from the research:
- For any TPO system older than roughly 7–12 years, request forensic peel testing before approving repair work.
- If the peel test shows a clean separation across multiple test points, treat the membrane as a replacement candidate, not a repair candidate.
- Document all test results in writing. This supports insurance claims, CapEx planning, and warranty negotiations.
- In Florida’s UV environment, expect the Weld Window to close at the earlier end of the 7–10 year range, not the later end.
7. TPO roof problems can create serious safety hazards
A leaking TPO roof is not just a property maintenance issue. Left unaddressed, it creates hazards that go well beyond a wet floor.
Electrical risk is the most immediate concern. Water infiltrating through failed seams or punctures can reach electrical conduits, junction boxes, lighting fixtures, and panel boards. In commercial buildings, this creates shock and fire risk for occupants and maintenance staff. If you see water near any electrical equipment, treat it as an emergency and shut off power to the affected circuit before anything else.
Structural damage develops more slowly but is often more expensive. Saturated insulation transfers moisture to the roof deck, whether wood, steel, or concrete. Wood decks rot. Steel decks corrode. Concrete decks can develop freeze-thaw cracking in cooler climates, though in Florida the primary concern is sustained moisture loading that weakens the deck’s fastener-holding capacity over time. By the time deck damage is visible from inside the building, the repair scope has grown significantly.
Mold and air quality follow moisture into insulation and interior assemblies. Mold growth in commercial buildings triggers health concerns for occupants and liability exposure for property owners. Commercial water damage from a roof leak can escalate quickly once moisture reaches interior finishes and HVAC systems.
Slip and fall liability is a real exposure in any building where a roof leak reaches a floor surface used by employees, customers, or tenants. Document the leak, act promptly, and keep records of every repair step.
The practical message: a TPO roofing issue that looks minor from the outside can be driving significant hidden damage. A professional inspection with moisture scanning gives you the full picture before you decide how to respond.
8. What I see on Tampa Bay TPO roofs every season
Florida’s climate is harder on TPO than most property owners realize. The combination of year-round UV loading, high surface temperatures, and the moisture cycling that comes with our wet season creates conditions where the Weld Window can close faster than the national averages suggest. I’ve seen 45-mil systems on south-facing low-slope roofs in the Tampa Bay area show surface crazing and seam lifting well before the 10-year mark.
The failure pattern I see most often is not a dramatic membrane blow-off. It’s a slow seam separation at a perimeter detail or a pipe boot that was never properly flashed, combined with ponding water that sits against that detail after every rain. By the time the owner notices ceiling staining, the insulation beneath is already saturated across a wider area than the visible leak suggests.
My recommendation for any property manager with a TPO roof older than seven years: schedule a forensic inspection before hurricane season, not after. Get a peel test done at multiple points across the field and at the perimeter seams. If the results show clean peels at more than a handful of locations, the conversation shifts from “how do we patch this?” to “what does a 60-mil replacement look like and what warranty comes with it?” That is not a conversation you want to have for the first time in the middle of a storm response.
When my team documents membrane embrittlement across a significant portion of a roof, we stop recommending repeated patching. The math does not work: each patch on an oxidized surface is a temporary mechanical bond, not a durable weld. The right answer is a properly specified replacement with a 60-mil system, manufacturer-backed warranty, and a drainage plan that addresses any ponding that contributed to the original failure.
Hytzroofing handles TPO inspections, repairs, and replacements in Tampa Bay
📋 If your TPO roof is showing any of the problems described in this article, the fastest path to a clear answer is a professional on-roof inspection with seam testing. Hytzroofing provides documented TPO inspections, forensic peel testing, repair and replacement proposals, and full insurance claim support for commercial and residential flat roofs throughout Tampa Bay and Central Florida.
Every TPO project includes photographic documentation, a written scope, and manufacturer-backed warranty coverage.
Whether you need a targeted seam repair, a full TPO roof replacement in Tampa, or emergency tarping after storm damage, the team is ready to respond. Request a free estimate and get a written inspection report you can use for insurance or CapEx planning.
Sources
These are the primary technical sources referenced in this article. Each is worth reading if you want to go deeper on TPO performance, testing methodology, or repair practice.
- WSRCA Technical Bulletin No. 2024_LSRC-03 - Long-term TPO Exposure Performance Concerns
- A forensic approach to TPO surface oxidation and long-term integrity | Roofing Contractor
- CIB W83 TPO Roof Membranes: Historical Perspectives and Guidelines
- TPO roofing membrane failures: causes, diagnostics, and prevention | New England Metal Roof
- Evaluating real-world performance of field-aged TPO roofs | Building Enclosure
- TPO Commercial Roofing Problems | Roofing Dynamics Group
FAQ
What is the average lifespan of a TPO roof?
A well-installed TPO system typically lasts 15–25 years in moderate climates, with 45-mil membranes generally carrying shorter warranties than 60-mil systems. In Florida’s high-UV environment, expect performance closer to the lower end of that range, particularly for 45-mil installations.
Should TPO roofing hold water all the time?
No. Standing water that remains more than 48 hours after rain is a problem. Ponding accelerates membrane degradation, stresses seams and flashings, and usually signals a drainage design issue that needs to be corrected, not just patched over.
Is it okay to walk on a TPO roof?
Yes, with precautions. TPO can handle occasional foot traffic, but repeated walking in the same paths causes abrasion and puncture risk. Install walk pads on any regular traffic routes, especially paths to HVAC units, to protect the membrane surface.
Can I pressure wash a TPO roof?
Low-pressure rinsing to clear debris is generally acceptable, but high-pressure washing can damage seams and surface coatings. Always check with your membrane manufacturer’s maintenance guidelines before using any pressure washing equipment on a TPO system.
Why is my TPO roof leaking even though it looks fine from the ground?
Most TPO leaks originate at localized details like seam edges, pipe boots, flashings, or perimeter edge metal, none of which are visible from the ground. A qualified contractor with on-roof access and a seam probe can locate the source quickly. Property owners frequently mistake an active leak for a failed membrane when the actual problem is a single compromised detail that is straightforward to repair if caught early.