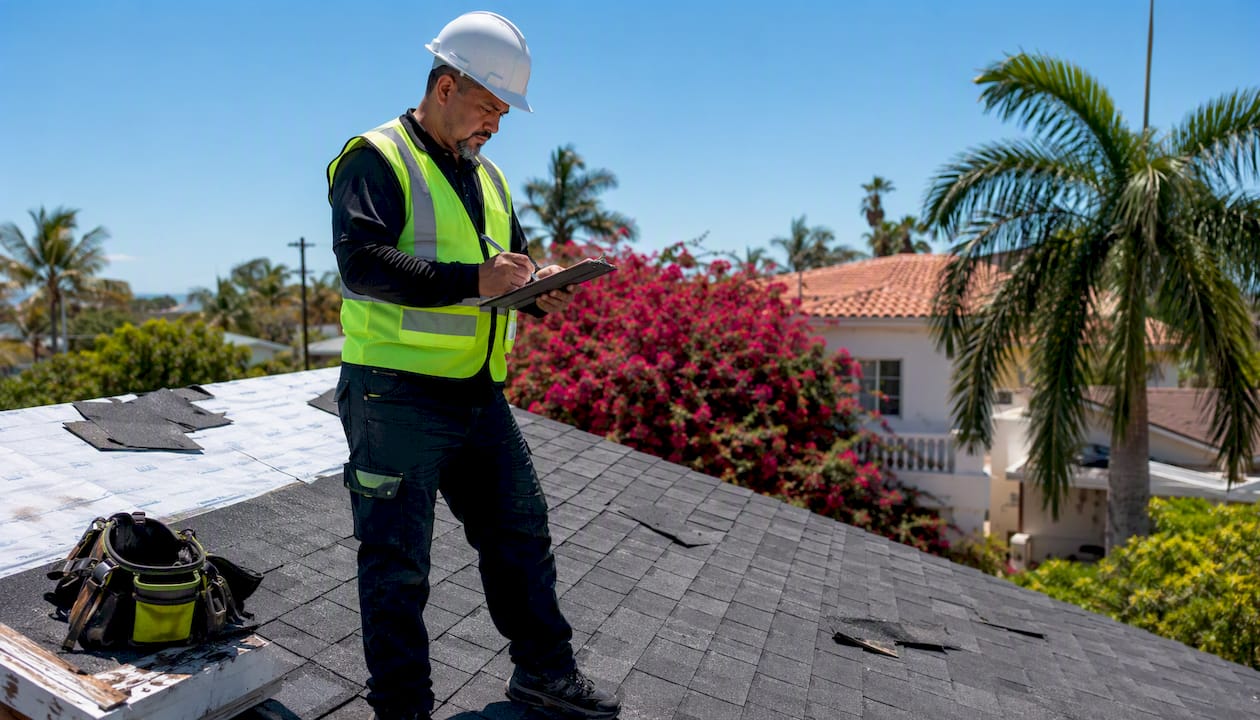
Roof Shingle Replacement Step by Step for Florida Homeowners
Roof shingle replacement provides Florida homeowners a clear, step-by-step overview of inspection, tear-off, underlayment, shingle installation, and final checks.
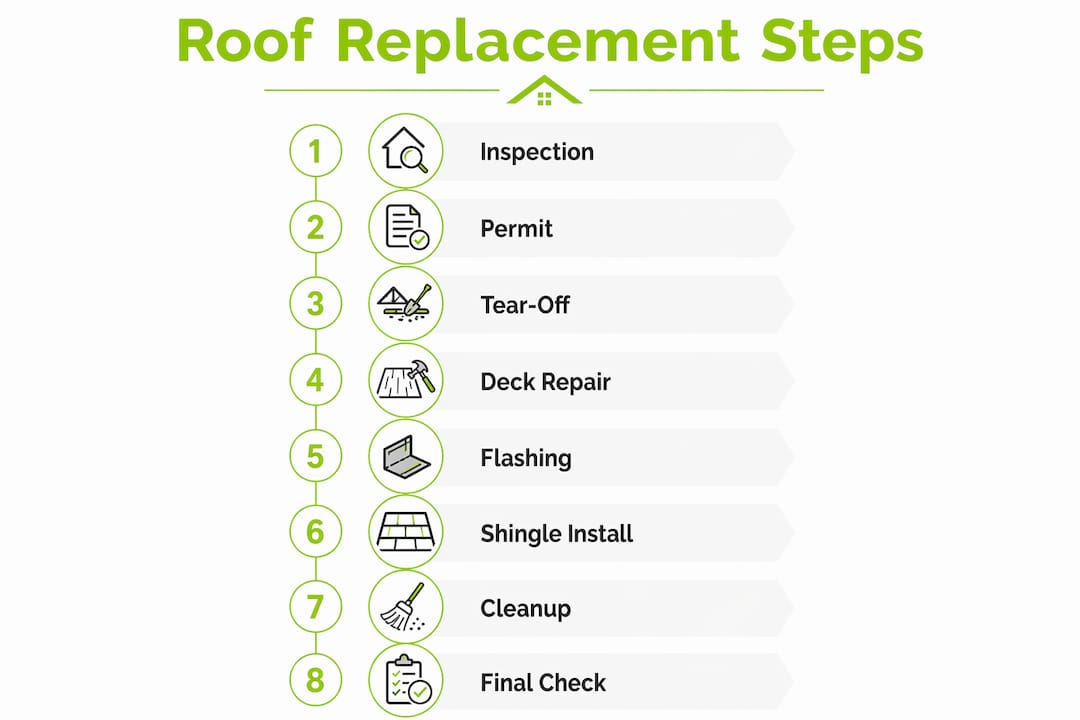
A professional roof shingle replacement follows seven core stages: tear-off, deck inspection and repair, drip edge and underlayment, starter row, staggered shingle courses, flashing and penetration sealing, then ridge capping and cleanup. Here’s what to expect from a licensed contractor:
- Tear-off: Remove existing shingles, nails, and underlayment down to the deck
- Deck inspection and repair: Check for rot, soft spots, or delamination; replace damaged plywood or OSB
- ️ Drip edge and underlayment: Install drip edge, then lay underlayment with proper overlaps
- Starter shingles: Set the first course with correct overhang and nailing
- Staggered shingle courses: Install main field shingles in offset rows using chalk lines
- Flashing and penetrations: Seal chimneys, vents, valleys, and all roof penetrations
- ️ Ridge capping and cleanup: Cap the ridge, verify ventilation, and do a full magnetic nail sweep
For Florida homeowners, always hire a licensed roofing contractor who pulls permits and carries workers’ comp. Hytz Roofing holds GAF Master Elite® status, and IKO’s own guidance confirms that even small nailing or sealant errors can compromise wind resistance.
Pro Tip: Ask your contractor to confirm the nailing pattern on the written estimate before work starts. In Florida’s high-wind zones, 6 nails per shingle is the standard, not 4.
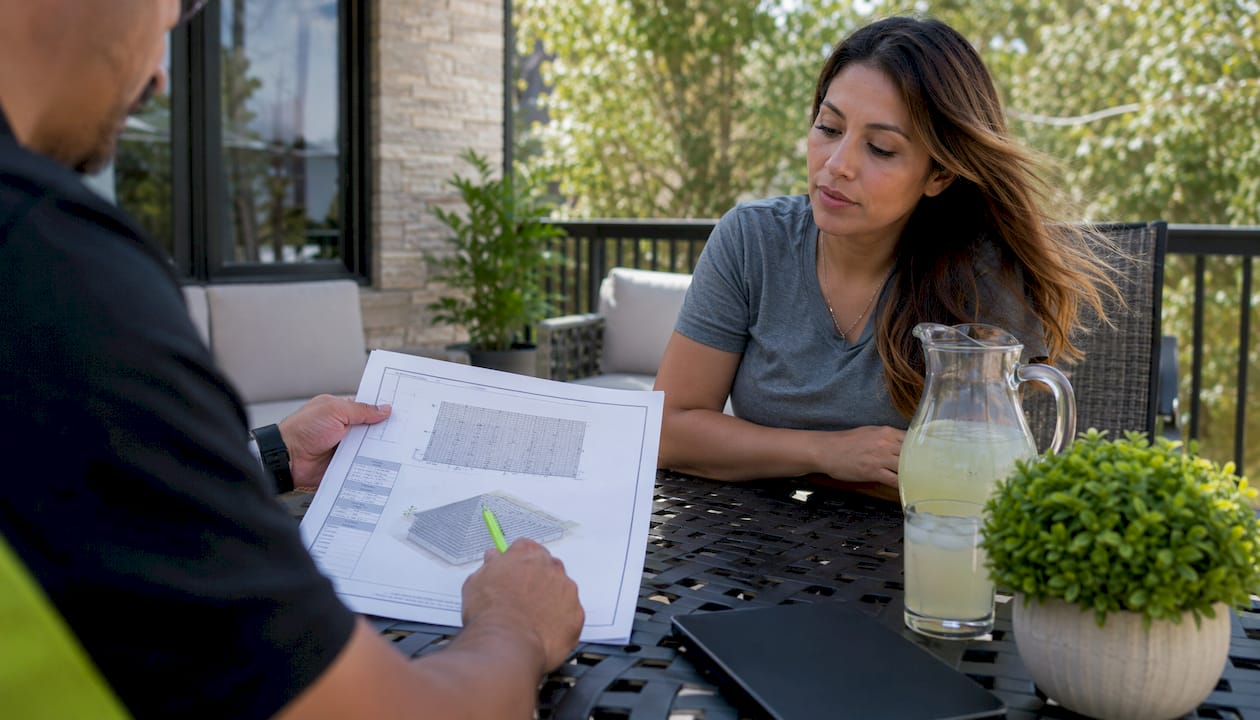
Table of Contents
- What does each step of a roof shingle replacement actually involve?
- Full tear-off versus overlay: what Florida code and common sense say
- What affects the price and timeline of a roof replacement?
- Common installation mistakes and red flags to watch for
- How do you verify and hire a licensed Florida roofing contractor?
- What should you expect during the replacement?
- What warranty coverage should you expect on materials and labor?
- Key Takeaways
- What the credentials actually mean for your roof
- Hytz Roofing: certified replacements for Tampa Bay homeowners
- Useful sources and where to verify Florida contractor credentials
What does each step of a roof shingle replacement actually involve?
Understanding what your crew is doing each day helps you catch problems early and verify quality work.
-
Tear-off. Contractors start at the ridge and work peak-to-eave, using roofing shovels to strip shingles, nails, and old underlayment. All old nails get removed or hammered flat. A dumpster is placed close to the house, and tarps protect landscaping. Controlling debris from the top down keeps the job site safer and cleaner.
-
Deck inspection and repair. Once the deck is bare, the crew walks it to find soft spots, rot, or delaminated OSB. Any compromised sections get replaced with matching plywood or OSB and fastened per local code. This step is only possible with a full tear-off, which is why reputable contractors prefer it over overlays.
-
Drip edge and underlayment. Drip edge goes on the eaves first, then underlayment is rolled out from the bottom up. Standard practice calls for underlayment courses to overlap at least 2 inches, with seams offset by 6 inches to block leak paths. In vulnerable areas like eaves and valleys, ice-and-water shield adds a second layer of protection. Rake drip edge installs on top of the underlayment.
-
Starter shingles. The starter course sets the foundation for every row above it. It overhangs the drip edge by roughly half an inch and is nailed with the adhesive strip positioned toward the roof’s edge. Skipping or rushing this step causes the first full course to lift in wind.
-
Main shingle courses. Contractors snap chalk lines to keep rows straight and stagger joints between courses so no two vertical seams align. Each shingle gets several nails, with increased nailing recommended in Florida’s high-wind zones for better resistance. Nails land just above the adhesive strip, not through it. When replacing individual shingles, the crew breaks seal bonds on the target shingle and the two courses above it, then re-seals tabs with asphalt roof cement per IKO’s guidance.
-
Flashing and penetrations. Flashing is the single most common source of roof leaks, so this step deserves close attention. Step flashing weaves between shingles and walls; counterflashing embeds into chimney mortar joints. Valley flashing protects the most water-prone seams on the roof. Every exposed fastener gets sealed.
-
Ridge capping and cleanup. Ridge cap shingles overlap the top course on each side and get nailed with the adhesive strip running perpendicular to the ridge. After the last cap is set, the crew does a full magnetic nail sweep of the driveway and yard, removes the dumpster, and photographs the completed roof for warranty documentation.
Pro Tip: Schedule your replacement for a day when temperatures are in the 60s°F if possible. Moderate temperatures help factory sealant bonds activate correctly. Florida’s summer heat makes sealant extremely tacky and can cause shingles to tear during handling.
Full tear-off versus overlay: what Florida code and common sense say
An overlay (re-roof) lays new shingles directly over existing ones. A full tear-off removes everything down to the deck before starting fresh.
| Factor | Full tear-off | Overlay |
|---|---|---|
| Short-term cost | Higher | Lower |
| Long-term durability | Better | Reduced |
| Deck inspection access | Full access | None |
| Warranty impact | Full manufacturer warranty available | Many warranties voided or limited |
Florida’s building codes generally cap asphalt shingle roofs at two layers total. If your home already has two layers, a full tear-off is required by code, no exceptions.
Beyond code, overlays are a poor fit for Florida specifically. Storm-prone regions see contractors advising against overlays because hidden deck rot, mold, and moisture damage go undetected until the next major storm exposes them. Flashing also cannot be properly replaced through an overlay.
Choose a full tear-off when:
- The roof is more than 15–20 years old
- There is already one existing shingle layer
- You suspect any deck damage or moisture intrusion
- Your insurer or shingle manufacturer requires it for a full warranty
- You are in a Florida wind zone (which is most of the state)
What affects the price and timeline of a roof replacement?
A standard single-family roof replacement in Tampa Bay typically runs from one to three days for the installation itself, though site prep, permit approval, and inspections can extend the overall project timeline.
Cost drivers to understand:
- Square footage and roof pitch (steeper = more labor)
- Shingle class (3-tab vs. architectural vs. impact-resistant)
- Underlayment type (standard felt vs. synthetic vs. ice-and-water shield)
- Number of penetrations (vents, skylights, chimneys)
- Flashing complexity and whether valleys need full replacement
- Deck repair scope discovered after tear-off
- Permit fees and disposal costs for old shingles
Reading your estimate carefully matters. A solid written bid should break out labor, materials (with make and model), permit fees, disposal, and warranty terms as separate line items. Learn how to read roofing estimate line items before you sign anything, and get at least three written bids for comparison.
If storm damage is involved, your insurance adjuster’s scope may change once the deck is exposed. Keep a copy of the adjuster’s report and ask your contractor to document any supplemental damage in writing before proceeding. Financing options are also available for homeowners who need them. Comparing bank versus contractor roof loans can save you money depending on your credit profile and timeline.
Common installation mistakes and red flags to watch for
Poor workmanship is often invisible until the first hard rain or hurricane. Here’s what to watch for.
Installation mistakes that cause failures:
- Too few nails or nails placed through the adhesive strip instead of above it
- Flashing installed without proper step or counterflashing details
- Underlayment seams aligned with shingle joints (creates a direct leak path)
- Old nails left in the deck, causing bumps under new shingles
- Inadequate attic ventilation, which shortens shingle life and voids warranties
Contractor red flags:
- No written contract or scope of work
- Cannot produce a Florida contractor license number or proof of insurance on request
- Demands full payment upfront in cash
- Refuses to pull a permit
- Pressures you to sign immediately after a storm
Warranty killers:
- Overlaying when the manufacturer requires a full tear-off for warranty coverage
- Using non-certified installation methods (GAF Master Elite contractors follow manufacturer-required practices that protect warranty eligibility)
- Failing to re-seal disturbed shingle tabs with asphalt cement after repairs, per IKO’s repair guidance
How do you verify and hire a licensed Florida roofing contractor?
Florida’s licensing requirements exist for a reason. Here’s a practical checklist before you sign.
- Verify the license. Ask for the contractor’s Florida license number and confirm it at the Florida Department of Business and Professional Regulation (DBPR) portal. A valid license means the contractor met state standards for insurance and competency.
- Confirm insurance. Request certificates of general liability and workers’ compensation. If a worker is injured on your property without workers’ comp, you could be liable.
- Check manufacturer credentials. Ask for proof of GAF Master Elite® or GAF Certified Commercial Contractor status. These certifications require ongoing training and are a condition for some manufacturer-backed warranties.
- Review the contract. Require scope of work, materials make and model, permit responsibility, payment schedule, cleanup plan, and a change-order process in writing.
- Check BBB and reviews. An A+ BBB rating and recent local references are quick filters. Ask for two or three recent jobs you can call.
Pro Tip: Ask the contractor to show you the permit copy before work begins. A contractor who pulls permits is accountable to a third-party inspection, which protects you. For a deeper contractor vetting guide specific to Tampa Bay, Hytz Roofing has published a full breakdown.
What should you expect during the replacement?
Before the crew arrives:
- Move vehicles out of the driveway
- Cover HVAC units and landscaping near the house
- Remove wall art and fragile items from attic shelves (vibration is real)
- Clear attic access for deck inspections
- Plan for noise from 7 AM onward for one to three days
Day-by-day on a typical job:
- Day 1: Tear-off, debris removal, deck inspection and any repairs
- Day 2: Drip edge, underlayment, starter course, and beginning field shingles
- Day 3: Complete field shingles, flashing, ridge caps, and final cleanup
Safety and environmental notes: Licensed crews use fall-arrest systems and scaffolding where required. Debris containers should be positioned to avoid blocking storm drains. Old asphalt shingles can often be recycled into road base material. Ask your contractor about their disposal plan.
Documentation to collect at the end:
- Signed contract and final invoice
- Permit copy and inspection sign-off
- Manufacturer warranty paperwork
- Labor warranty from the contractor
- Completion photos of flashing, ridge, and all penetrations
What warranty coverage should you expect on materials and labor?
Roofing warranties come in two forms, and both matter.
Manufacturer material warranties cover defects in the shingles themselves. Standard architectural shingles often carry limited lifetime warranties, but the coverage terms vary significantly. GAF’s System Plus and Golden Pledge warranties, for example, are available only through certified contractors like GAF Master Elite installers. An uncertified installer typically limits you to a basic material-only warranty with shorter coverage periods.
Contractor labor warranties cover installation defects. These range from one year on the low end to ten or more years from established contractors. A labor warranty is only as good as the contractor standing behind it, which is why licensing, insurance, and a physical business address matter.
A few things to know: overlaying when the manufacturer requires a full tear-off will void or limit the material warranty. Missing or incorrect flashing is the most common reason warranty claims get denied. Keep all warranty paperwork with your home records, especially if you plan to sell.
Key Takeaways
A licensed Florida contractor who performs a full tear-off, installs flashing correctly, uses 6 nails per shingle in wind zones, and carries GAF Master Elite credentials gives you the best combination of code compliance, wind resistance, and manufacturer warranty protection.
| Point | Details |
|---|---|
| Full tear-off is the standard | Florida’s storm exposure and code limits make full tear-off the right call for most replacements. |
| Nailing pattern matters | High-wind zones require 6 nails per shingle; confirm this on your written estimate before work starts. |
| Flashing is the leak risk | Incorrect flashing is the leading cause of warranty claim denials and post-installation leaks. |
| Verify credentials in writing | Check Florida license at the DBPR portal, request insurance certificates, and ask for GAF Master Elite proof. |
| Hytz Roofing is a verified option | Hytz Roofing holds GAF Master Elite, GAF President’s Club, a Florida license, and an A+ BBB rating. |
What the credentials actually mean for your roof
Most homeowners focus on price when comparing roofing bids. That’s understandable. But the credential gap between a GAF Master Elite contractor and an unlicensed crew isn’t just a marketing distinction. It determines whether your manufacturer warranty is valid, whether your installation meets Florida’s wind-resistance requirements, and whether someone is legally accountable if something goes wrong.
Hytz Roofing holds GAF Master Elite® status, an honor held by fewer than 2% of roofing contractors across North America, along with the GAF President’s Club Award for consistently superior installation quality. Florida Contractor License information is on file and can be verified. The combination of manufacturer certification and state licensing means every job is backed by both a labor warranty and the full manufacturer warranty tier, not a reduced version.
The honest reality: a roof replacement is one of the largest single investments a homeowner makes. The difference between a certified installation and a cut-rate one often doesn’t show up until the first Category 2 storm rolls through Tampa Bay.
Hytz Roofing: certified replacements for Tampa Bay homeowners
Getting a new roof in Tampa Bay shouldn’t feel like a gamble. Hytz Roofing delivers residential roof replacements backed by GAF Master Elite® certification, the 2024 Brava Roof Tile Excellence Award, the Angi Super Service Award 2025, and a BBB A+ rating. Every job includes a written line-item estimate, permit handling, full tear-off, and a manufacturer-backed warranty.
Storm damage? We handle insurance claims from adjuster coordination to final inspection. Need financing? We work with third-party lenders so you can move forward without waiting. From emergency repairs to full residential roof replacements in Tampa Bay, Hytz Roofing is licensed, insured, and ready. Request your written inspection today.
Useful sources and where to verify Florida contractor credentials
- Rooflio: What does it mean to replace a shingle roof? Covers the full professional replacement sequence, nailing standards, and flashing priorities.
- This Old House: Read this before you redo your roof Explains overlay versus tear-off tradeoffs and storm-region considerations.
- IKO: How to replace missing shingles Details single-shingle repair steps, sealant practices, and why DIY errors reduce wind resistance.
- Fine Homebuilding: Replacing an asphalt shingle Covers temperature sensitivity and best practices for shingle handling.
To verify a Florida contractor license: Visit the Florida DBPR at myfloridalicense.com and search by license number or contractor name. Always request a certificate of insurance directly from the contractor’s insurer, not a copy the contractor provides.
Keep copies of your estimate, permit, final invoice, and all warranty paperwork in a dedicated home file. If you ever file an insurance claim or sell your home, that documentation is the difference between a smooth process and a dispute.
Recommended
- Best SharpeRoof.com Alternatives for Florida Homeowners | Hytz Roofing
- Choose the Best Roofing Contractor in Tampa Bay, Florida: Your Guide | Hytz Roofing
- Roof Repair in Tampa Bay: Your Guide to Florida’s Elements | Hytz Roofing
- Deferred Payment Roof Financing Options: 2026 Guide | Hytz Roofing
Related Hytz Roofing Services
Frequently Asked Questions
- How long does a roof last in Florida?
- Asphalt shingle roofs in Florida typically last 15–25 years due to intense UV exposure, high humidity, and frequent storm events — shorter than the 25–30 year lifespan in cooler climates. Metal roofs last 40–70 years; concrete tile 30–50 years. Regular maintenance and prompt repairs extend any roof's lifespan significantly.
- How much does a new roof cost in Tampa, Florida?
- A standard asphalt shingle roof replacement in Tampa ranges from $10,000 to $25,000 depending on roof size, pitch, and material selection. Metal roofing runs $18,000–$45,000; tile roofing $20,000–$50,000. Hytz Roofing provides free, no-obligation estimates — call (813) 436-0761.
- Does Hytz Roofing serve my area?
- Hytz Roofing serves the greater Tampa Bay area including Tampa, Brandon, Riverview, Clearwater, St. Petersburg, Sarasota, Lakeland, Orlando, and surrounding communities. Call (813) 436-0761 to confirm service availability in your area.
- What warranty does Hytz Roofing offer?
- Hytz Roofing provides a 25-year workmanship warranty on all installations. As a GAF Master Elite certified contractor, we can also offer the GAF Golden Pledge 50-year warranty — the strongest warranty in the roofing industry — on qualifying GAF material systems.
- How do I get a free roof estimate from Hytz Roofing?
- Call (813) 436-0761 or submit a request at hytzroofing.com/contact. Hytz Roofing provides free same-day inspections and written estimates with no obligation.