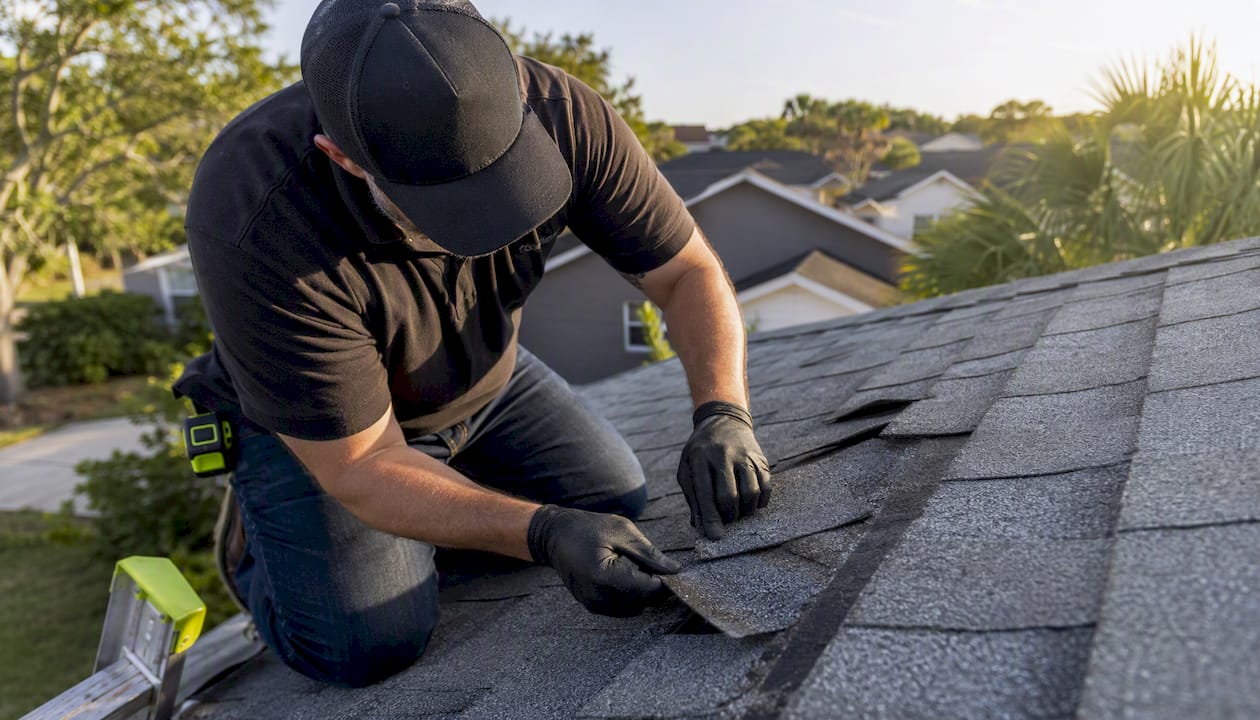
Wind Damaged Shingles: What Tampa Homeowners Should Do Now
Wind Damaged Shingles are a common post-storm risk; homeowners should quickly inspect for missing or loose shingles, protect exposed roofing, and document damage.
When wind damage affects more than a few shingles, Hytz Roofing can outline residential storm-damage roofing options that match the condition of the entire system.
If you’re seeing lifted tabs, missing shingles, or granules piling up in your gutters after a storm, wind damage is the most likely cause — and your first move should be to document everything before touching anything. 🚨
Here’s what to do in the first 24–72 hours:
- Stay off the roof. Wet decking and unstable shingles are slip hazards. Let a licensed contractor assess from above.
- Walk the perimeter. Look for shingles on the ground, debris patterns, and exposed dark underlayment from the ground level.
- Take timestamped photos. Capture wide roofline shots, close-ups of any lifted or missing tabs, and interior ceiling spots if you see staining.
- Cover exposed decking immediately. If you can see bare wood or underlayment from the ground, call for emergency tarping right away — water intrusion can begin within hours.
- Notify your insurer. Most Florida policies require prompt notice after a storm event. Call the same day if possible.
Pro Tip: Take your photos before any temporary repairs. Insurers need to see the damage as the storm left it. A tarp placed before documentation can complicate your claim.
🔑 If you see exposed decking, active ceiling leaks, or more than a few missing shingles, treat it as an emergency. Temporary protection within the first 24 hours can prevent thousands of dollars in secondary water damage.
Key Takeaways
Wind-damaged shingles require prompt documentation, professional inspection, and a repair-vs.-replace decision grounded in roof age, exposure extent, and insurance policy type.
| Point | Details |
|---|---|
| Document before you repair | Timestamped photos of all damage must be taken before tarping or patching to protect your insurance claim. |
| Physical evidence wins claims | Adjusters require creasing, tearing, or delamination — not just lifted shingles — to approve a wind damage payout. |
| Hidden damage is common | Unsealed shingles and wind-driven moisture can cause rot and mold within weeks even when the roof looks intact from the ground. |
| Roof age drives the repair decision | Roofs past 15 years with granule loss or brittle shingles often cost less over time with full replacement than repeated spot repairs. |
| Hytzroofing handles the full process | As a GAF Master Elite® Contractor (License #CCC1332551), Hytzroofing provides inspection, emergency tarping, and insurance claim support across Tampa Bay. |
Table of Contents
- How to spot wind damage on your asphalt shingles
- What actually causes shingles to fail in wind
- Hidden damage: why a roof that looks “OK” can still be compromised
- After the storm: your 24–72 hour checklist
- Repair options: spot repair, partial re-roof, or full replacement?
- Will insurance cover wind-damaged shingles? How to document and present your claim
- How professionals assess wind damage: the inspection process
- How to reduce future wind damage and pick wind-rated shingles
- When to call a contractor: what a Hytzroofing inspection includes
- What I see after every Tampa Bay storm
- Hytzroofing: storm damage inspections and full claim support in Tampa Bay
- Sources
- FAQ
How to spot wind damage on your asphalt shingles
Not every roof problem after a storm is wind damage. Age, poor installation, and foot traffic can all produce similar-looking symptoms. Knowing the difference helps you describe the damage accurately to your adjuster and collect the right photos.
Visual signs that point to wind damage:
- Creased or folded tabs. A sharp horizontal crease across a shingle tab is one of the clearest signs of wind uplift. The shingle lifted, bent back, and left a permanent fold.
- Missing shingles. Gaps in your field or ridge are obvious, but pay attention to where they are. Wind-blown shingles tend to disappear from edges, ridges, and corners first.
- Shredded or torn edges. Shingles that partially tore away leave ragged edges with exposed fiberglass mat — a sign of tearing force, not just aging.
- Granules in gutters or on the ground. A heavy granule deposit after a storm signals that the protective coating has been knocked loose. CertainTeed notes that granule loss often signals reduced remaining shingle life.
- Lifted but still-attached shingles. These are trickier. A shingle that lifted and re-laid itself may look intact but has broken its adhesive seal. Adjusters often dispute these because they require closer inspection to confirm.
Where to look beyond the roof surface:
Check your attic within 24 hours of the storm. Daylight streaks, wet insulation, or water stains on the decking boards point to breaches you cannot see from the ground. Inside the home, fresh ceiling stains or bubbling paint near exterior walls are worth photographing immediately.
Pro Tip: For your photo documentation, take at least three shot types: a wide-angle of the full roofline, a mid-range shot showing the damage zone in context, and a close-up of each individual damaged shingle. Timestamp every image.
📋 “Granule loss is not just cosmetic — it’s a performance indicator. Once the granule layer thins significantly, the asphalt beneath degrades faster under UV exposure and heat, shortening the shingle’s remaining service life.” — CertainTeed storm damage guidance
What actually causes shingles to fail in wind
Wind speed alone doesn’t tell the whole story. Two identical roofs in the same storm can produce very different outcomes depending on installation quality, shingle age, and product design.
Practitioner guidance from Southern Loss identifies the most common failure modes:
- Creasing. The tab lifts, bends past its flex point, and creases permanently. Common on older or brittle shingles.
- Tearing. The shingle tears at the nail line or along the tab, often exposing the fiberglass mat beneath.
- Nail pull-through. Nails placed too high (above the nail line) or too few per shingle reduce holding strength. Under uplift pressure, the shingle pulls over the nail head.
- Sealant delamination. The adhesive strip that bonds overlapping shingles loses contact, either from age, heat cycling, or improper installation. Once the seal breaks, the tab is free to lift.
- Brittleness from aging. Older shingles lose flexibility. Instead of bending under wind load, they crack or crumble at the edges.
Damage also concentrates in predictable locations. Edges, ridges, hips, and corners experience the highest aerodynamic pressure during a wind event. If you see damage clustered at those zones, that pattern itself is evidence pointing toward wind as the cause.
The Asphalt Roofing Manufacturers Association explains that wind resistance depends on both mechanical fastening and the adhesive seal strip working together. A shingle with a high wind-speed rating installed with too few nails or misplaced fasteners will underperform its rating in the field.
Hidden damage: why a roof that looks “OK” can still be compromised
This is the part most homeowners miss. A roof with only two or three missing shingles can look manageable from the street — but the real risk is often the dozens of shingles nearby that lifted, broke their seal, and re-laid themselves without leaving obvious visual clues.
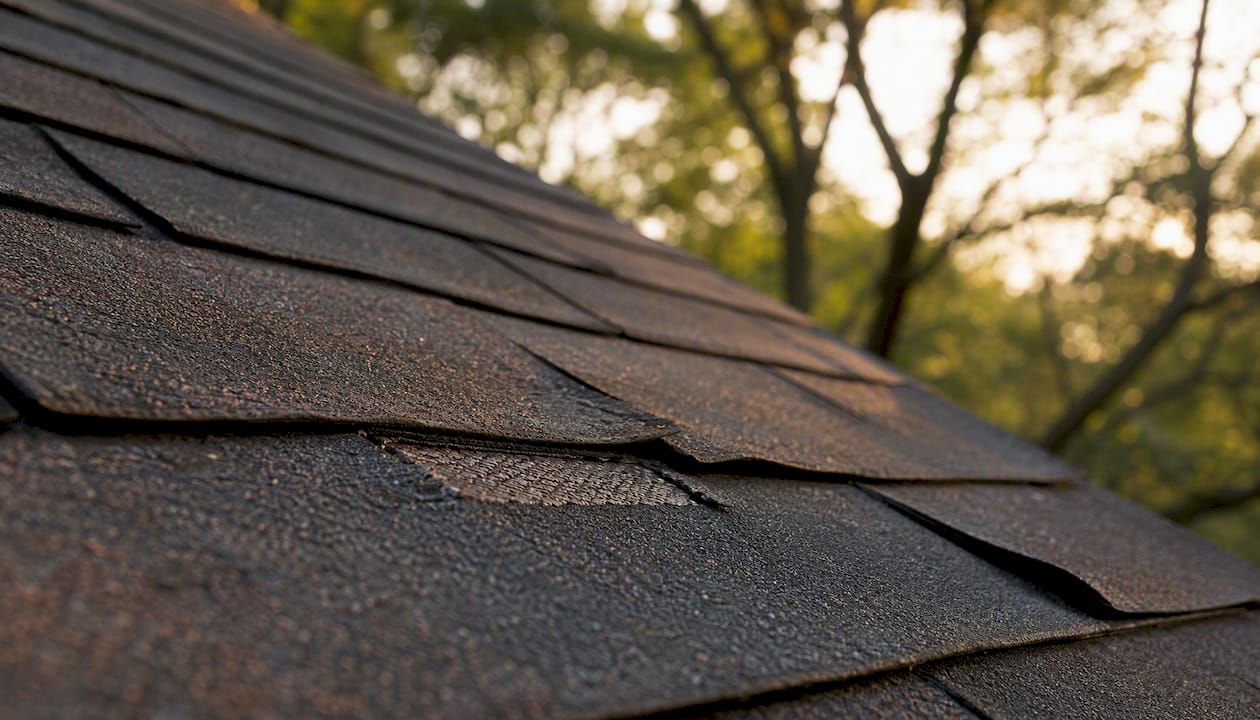
Once the adhesive seal breaks, those shingles are essentially held in place by nails alone. The next moderate wind event can send them flying. More immediately, CertainTeed’s guidance explains that wind-driven rain can push moisture beneath shingles and underlayment before any interior sign appears. In Tampa Bay’s climate, that moisture sits in a warm, humid environment — ideal conditions for mold and wood rot to develop within weeks.
The risk timeline matters:
- Days after the storm: Wind-driven rain enters through lifted or missing tabs, soaking underlayment.
- Weeks later: Wet underlayment begins to degrade; decking boards absorb moisture and may start to soften.
- Months later: Mold growth, structural rot, and interior ceiling damage become visible — and far more expensive to fix.
⚠️ “Document all visible damage before making any repairs or covering the roof. Insurers and adjusters need to see the original condition. Repairs made before documentation can reduce or void a claim payout.” — NWS Spotter Quick Reference
Pro Tip: If your roof is more than 10 years old and you experienced sustained winds above 45 mph, schedule a professional inspection even if the roof looks intact from the ground. Unsealed shingles are nearly impossible to spot without getting on the roof.
After the storm: your 24–72 hour checklist
📋 Work through these steps in order. Speed matters, but safety comes first.
- Stay safe. Do not go on the roof yourself. Wet shingles, hidden structural damage, and downed power lines make post-storm roofs dangerous. Wait for a licensed contractor.
- Document from the ground. Walk the full perimeter. Photograph every side of the roofline, any shingles on the ground, debris patterns, and gutter granule deposits.
- Check the attic and ceilings. Look for daylight, wet insulation, or fresh staining. Photograph anything you find with a timestamp.
- Secure exposed areas. If you see bare decking or underlayment, call for emergency tarping. NWS guidance recommends documenting with dated photos before any protective measures go up.
- Call your insurance company. Report the event the same day. Give them the storm date, your address, and a brief description. Ask what documentation they need.
- Request a professional inspection. A licensed roofing contractor can get on the roof safely, identify hidden damage, and produce a written report your insurer can use.
- Keep all receipts. Emergency tarping, temporary repairs, and hotel stays (if the home is uninhabitable) may be reimbursable. Save every document.
What to tell your insurer on the first call:
- Date and approximate time of the storm
- What you observed (missing shingles, interior leaks, debris)
- That you have timestamped photos ready
- Whether you’ve taken any emergency protective measures
Pro Tip: Ask your insurer for the claim number immediately and write it down. Every follow-up call, contractor visit, and document submission should reference that number.
Repair options: spot repair, partial re-roof, or full replacement?
The right repair depends on three things: how many shingles are affected, what’s exposed beneath them, and how old the roof is. Here’s how to think through it.
When spot repair makes sense:
- Fewer than 5–10 shingles are missing or damaged
- The underlayment beneath is dry and intact
- The roof is less than 10–12 years old
- Matching shingles are available (color and product line)
When partial or full replacement is the smarter call:
- Damage is spread across multiple slopes or covers a large area
- The underlayment or decking is wet, soft, or compromised
- The roof is 15+ years old and the shingles are already showing granule loss or brittleness
- Matching shingles are discontinued or the color has faded significantly from the existing field
A step-by-step breakdown of the shingle replacement process can help you understand what’s involved before you get an estimate.
Cost factors in Tampa Bay:
Roof shingle repair costs vary based on accessibility (steep pitch, two-story), the extent of decking damage, material costs, and local labor rates. Spot repairs for a handful of shingles typically cost hundreds of dollars, while partial re-roofs and full replacements can vary significantly depending on home size, roof pitch, and materials. Get a written, itemized estimate — and learn how to read roofing estimate line items so you know exactly what you’re paying for.
Pro Tip: Multiple isolated spot repairs on an aging roof often cost more over three years than a single partial or full replacement. If your roof is past 15 years, ask your contractor to run both scenarios side by side.
Will insurance cover wind-damaged shingles? How to document and present your claim
Most standard homeowners insurance policies in Florida cover wind damage to shingles — but the payout depends heavily on your policy type and how well you document the loss.
ACV vs. RCV — this distinction matters:
- Actual Cash Value (ACV): The insurer pays the depreciated value of the roof at the time of loss. A 15-year-old roof gets a fraction of replacement cost.
- Replacement Cost Value (RCV): The insurer pays what it actually costs to replace the damaged portion with like materials. This is the better policy for older roofs.
What adjusters look for on wind claims:
Adjusters are trained to distinguish true wind damage from age-related deterioration. Haag’s technical paper is explicit: unsealed shingles alone are not accepted as proof of wind damage. Adjusters look for physical evidence — a fresh crease across a tab, torn surfacing that exposes the fiberglass mat, or nail-hole pull-through with surrounding delamination. Lifted-but-intact shingles often draw disputes because they can result from age or heat, not wind.
Your claim documentation checklist: 📋
- Timestamped photos of all visible damage (exterior and interior)
- A written record of the storm date and approximate wind speeds (pull local gust data from NOAA/SPC climatology resources)
- A written inspection report from a licensed roofing contractor
- Any emergency repair receipts (tarping, temporary patches)
- Your policy number, claim number, and adjuster’s contact information
If your claim is disputed:
- Request a second inspection with a different adjuster.
- Hire a licensed roofing inspector to produce an independent written report.
- Ask your contractor about a forensic-style inspection that documents crease patterns, nail placement, and adhesive condition.
- Consider a licensed public adjuster if the dispute involves a significant payout.
NOAA/SPC storm data can provide recorded wind gust speeds for your area on the storm date — a useful exhibit when an adjuster questions whether the wind was strong enough to cause the damage you’re claiming.
How professionals assess wind damage: the inspection process
A trained inspector doesn’t just look at what’s missing. They build a pattern of evidence that distinguishes wind-caused damage from normal wear.
What a professional wind damage inspection covers:
- Close-up shingle exam. Every slope is walked. Inspectors look for fresh creases, torn surfacing, exposed fiberglass mat, and granule displacement patterns.
- Nail pattern check. Nails placed above the manufacturer’s nail line reduce holding strength significantly. This is documented in the report.
- Adhesive condition. The inspector checks whether the seal strip is intact, partially bonded, or fully delaminated — and whether the delamination looks fresh or aged.
- Directional damage clustering. Wind damage tends to cluster on the windward face and at edges, ridges, and corners. Random or uniform damage across all slopes suggests age or installation issues rather than a wind event.
- Weather data review. Recorded gust speeds from the nearest weather station are compared against the shingle’s rated wind resistance.
- Attic and moisture check. A moisture meter or infrared camera can detect wet decking or insulation that isn’t visible from above.
Haag’s technical paper on wind damage misconceptions makes a point that surprises many homeowners: a roof full of unsealed shingles is not automatically a wind-damage claim. Inspectors need to find physical evidence of wind force — creasing, tearing, or delamination with a directional pattern — to support that conclusion. The IIBEC summary on wind damage misconceptions reinforces this, recommending detailed pattern analysis across slopes and weather direction as part of any credible assessment.
Pro Tip: Ask your contractor to pull the nearest ASOS weather station gust data for the storm date and include it in the inspection report. That single document can resolve adjuster disputes about whether the wind was strong enough to cause damage.
How to reduce future wind damage and pick wind-rated shingles
Prevention starts with understanding what “wind-rated” actually means in practice — and what it doesn’t.
Wind ratings explained:
Manufacturer wind ratings represent the speed at which a shingle is tested to resist uplift under controlled lab conditions. Real-world performance depends on installation quality, roof geometry, and the age of the adhesive seal. The Asphalt Roofing Manufacturers Association notes that both mechanical fastening and the adhesive seal strip must work together for a shingle to perform at its rated speed.
For Tampa Bay, Class H or better is the practical minimum for new installations or replacements. Florida’s building code requirements for wind zones should be confirmed with your contractor and local building department.
Installation best practices that actually move the needle:
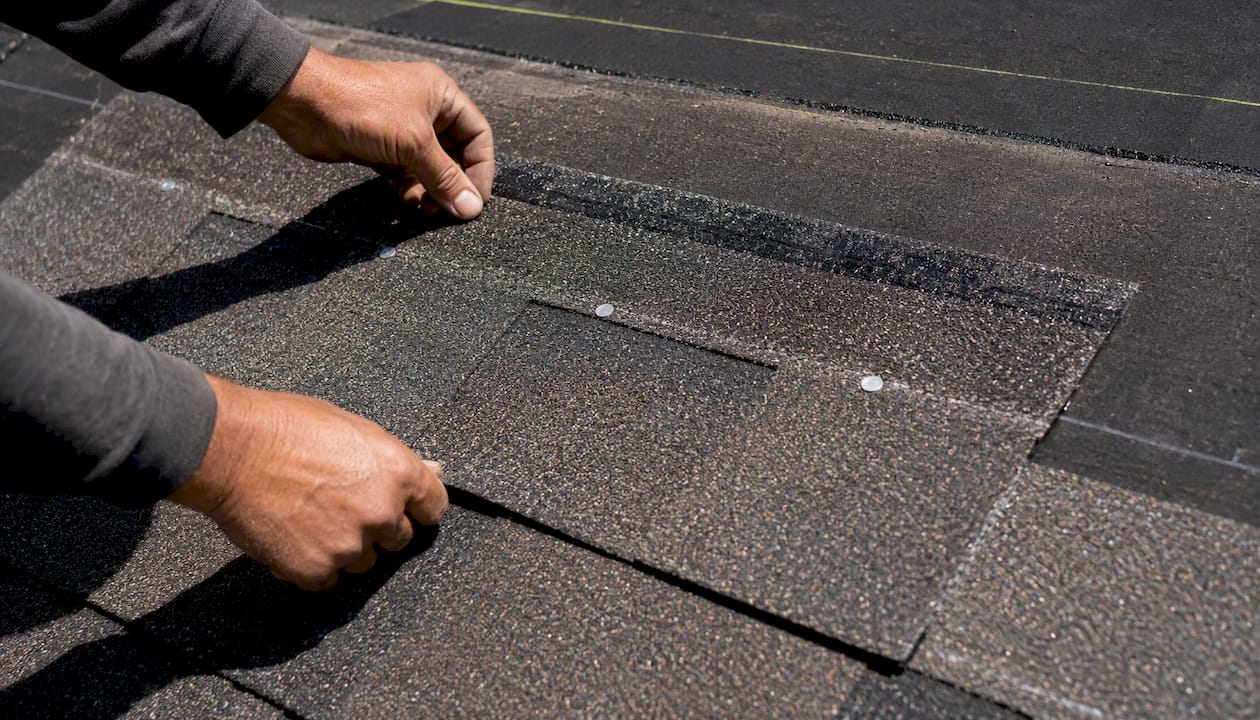
- Use the manufacturer’s specified nail count and placement (typically 4–6 nails per shingle, within the nail line).
- Apply adhesive dollops at eaves and ridges. FEMA’s installation guidance specifically recommends this, along with continuous load-path considerations to reduce wind uplift at the system level.
- Install a higher-grade underlayment (synthetic over felt) for better moisture resistance if the shingles are breached.
- Inspect and re-seal any lifted tabs before hurricane season each year.
Routine maintenance checklist:
- Check sealant condition on ridge caps and eave courses each spring.
- Monitor granule deposits in gutters after heavy rain — accelerating granule loss signals a shingle nearing end of life.
- Inspect flashing at chimneys, vents, and skylights for lifting or gaps.
- Schedule a preventive roof maintenance inspection before hurricane season.
Pro Tip: In Tampa Bay’s climate, the adhesive seal strip on asphalt shingles can soften and re-bond during hot summers, then crack in cooler months. An annual pre-season inspection catches this cycle before a storm does.
When to call a contractor: what a Hytzroofing inspection includes
Not every roofing company offers the same level of post-storm support. Here’s what a qualified inspection from a licensed contractor should include — and what Hytzroofing brings to the table specifically.
What a professional storm inspection should cover:
- On-roof close inspection of every slope, not just the visible side from the street
- Attic check for moisture, daylight, and decking condition
- Documented written report with photos, damage description, and nail pattern findings
- Weather data pull for the storm date (recorded gust speeds)
- Insurance-ready packet: report, photos, and weather data formatted for adjuster submission
Hytzroofing’s credentials and what they mean for you:
Hytzroofing is a GAF Master Elite® Contractor — a designation earned by fewer than 2% of roofing contractors in North America. That status means access to GAF’s strongest warranty products and a verified track record of installation quality. Hytzroofing holds Florida Contractor License #CCC1332551, carries general liability and workers’ compensation coverage, holds a BBB A+ rating, and has received industry recognition awards.
For storm response specifically, Hytzroofing handles emergency tarping, temporary repairs, full insurance claim documentation, and complete storm damage roof repair in Tampa Bay — from the first inspection call through the final installation.
Pro Tip: When choosing a contractor after a storm, verify their Florida license number on the DBPR website before signing anything. License #CCC1332551 is Hytzroofing’s — you can confirm it in under two minutes.
What I see after every Tampa Bay storm
After years of inspecting roofs across Tampa Bay following tropical storms, named hurricanes, and the fast-moving afternoon squalls that roll in off the Gulf, one pattern repeats itself: the roofs that suffer the most aren’t always the ones that took the hardest hit. They’re the ones where small, pre-existing issues — a few unsealed tabs, aging adhesive on the ridge caps, nails placed just above the nail line — got exposed by a wind event that would have been survivable with proper installation. Tampa Bay’s storm season runs long, and the cumulative effect of repeated moderate-wind events often does more damage than a single major storm. If your roof is more than 10 years old and hasn’t had a professional inspection since the last named storm, that’s the gap worth closing before the next one arrives.
Hytzroofing: storm damage inspections and full claim support in Tampa Bay
💬 After a storm, the last thing you need is to figure out the insurance process alone while worrying about water getting into your home.
We get on your roof, document everything an adjuster needs, pull the weather data, and hand you a claim-ready inspection packet. If you need emergency tarping first, we handle that too.
Our storm damage roof repair service covers everything from the initial inspection through final installation, with full insurance claim assistance built in. Whether you’re dealing with a few missing shingles or a roof that took a serious hit, we’ll tell you exactly what’s there and what it will take to fix it — no guesswork, no pressure.
📋 Call Hytzroofing today or request your inspection online. We serve homeowners across Tampa Bay and Central Florida, and we’re ready to move fast when the storm season demands it.
Sources
These are the primary references used throughout this article. Each covers a specific aspect of wind damage assessment, safety, or installation guidance.
- FEMA — ISM2 Section 1 (installation/high-wind guidance)
- Asphalt Roofing Manufacturers Association
- How to spot roof damage after a storm (CertainTeed)
- Evaluating wind damage in asphalt shingles (Southern Loss)
A note on weather data for claims: When filing a wind damage claim, pull the recorded gust speeds from the nearest Automated Surface Observing System (ASOS) station for the storm date. NOAA’s SPC climatology database is a reliable source for this. Include the printout in your claim packet.
FAQ
What does wind-damaged shingles look like?
Wind-damaged shingles typically show a sharp horizontal crease across the tab, torn or shredded edges, exposed fiberglass mat, or are missing entirely. Damage tends to cluster at edges, ridges, and corners where wind pressure is highest.
Will insurance cover shingles blown off by wind?
Most standard Florida homeowners policies cover wind-blown shingles, but the payout depends on whether you have ACV or RCV coverage and how well you document the damage. Adjusters require physical evidence of wind force — creasing, tearing, or delamination — not just missing or lifted tabs.
Are wind-damaged roof shingles worth replacing?
Yes, especially when the underlayment or decking beneath is exposed or wet. Leaving damaged shingles in place allows water intrusion that can cause mold and structural rot within weeks, making early repair far less expensive than delayed action.
What shingles have a 160 mph wind rating?
Select enhanced-performance shingles from manufacturers including GAF carry wind ratings up to 160 mph. Verify the specific product’s rating and confirm it meets your local Florida building code wind zone requirements before installation.
How do I document wind damage for an insurance claim?
Take timestamped photos of all damage before any repairs or tarping, pull recorded gust data from NOAA/SPC for the storm date, get a written inspection report from a licensed contractor, and submit all of it together with your claim. Prompt documentation preserves the strongest evidence.