Diagnose Skylight Leaks First With a Zone Hose Test for Homeowners
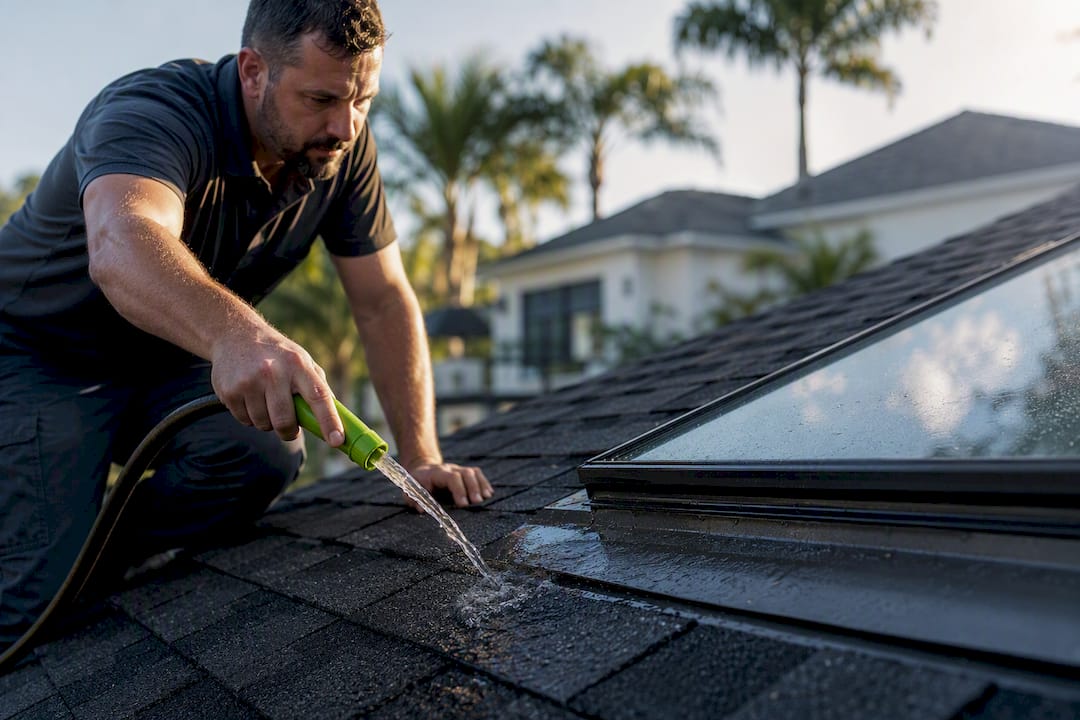
Most skylight leaks trace back to flashing or seal failures, not the glass itself. Before you patch anything, figure out which of four usual suspects you’re dealing with: flashing or gasket failure, condensation, ice-dam backflow, or a cracked curb and aging glazing. If the moisture only shows up during cold, dry weather, treat it as condensation first. Either way, diagnose before you repair.
TL;DR:
- Most skylight leaks result from flashing or seal failures, not the glass itself, and proper diagnosis is essential before repair.
- Conduct a staged hose test from the bottom up and inspect the attic to accurately identify the leak source, whether it’s condensation, flashing, or a cracked curb.
- Resealing is effective for units under 15 years with intact flashing, while full replacement is necessary for fogged glass or severely damaged units near the end of their lifespan.
- Regular maintenance, including annual inspections and clearing debris, can prevent most leaks and prolong the skylight’s lifespan.
- Professional inspection is advisable if leaks persist after repairs, or if you notice fogged glazing, structural staining, or recurring moisture issues.
Table of Contents
- How to Diagnose a Skylight Leak: Pattern Matching and the Hose Test
- Repair Options and What They Typically Cost
- Preventing Skylight Leaks: An Annual Maintenance Checklist
- When to Call a Professional Roofer
- Field Notes From Hytz Roofing
- Get a Skylight Inspection From Hytz Roofing
- Sources
- FAQ
How to Diagnose a Skylight Leak: Pattern Matching and the Hose Test
Timing tells you almost as much as the leak itself. A leak that only appears during heavy, wind-driven rain points to flashing or sealant. A leak that shows up only in cold weather with no rain outside is very likely condensation, not intrusion, and it often resolves once you improve ventilation. A leak that never stops, rain or not, usually means a cracked curb or a fully failed seal.
Where the moisture lands inside also narrows things down. Water at the top edge of the glass suggests head flashing or the upper gasket has failed. Water along one side points to step flashing. Water pooling at the bottom is frequently condensation runoff or an apron problem, while fogging or drips from the center of the glass almost always means the glazing seal itself is gone.
- Inspect the attic first. Look for staining on the curb, on the rafters directly above it, and for any separation at the curb corners.
- Run a zone hose test. Starting from the bottom, spray the apron for five minutes, then each side, then the head, then finally the glass itself, while someone watches from inside. This staged approach isolates exactly which zone lets water through, following the same sequence roofing inspectors use to trace stubborn leaks.
- Check for a failed IGU. Persistent fog between the panes that never clears, even on dry days, confirms the seal is gone regardless of what the hose test shows.
- Test the weep holes. Blocked or painted-over weep channels trap water that then finds its way inside.
- Document everything. Photograph each zone test with a timestamp so you have a record to hand a contractor or an insurance adjuster.
Pro Tip: Never skip the attic inspection because the ceiling stain “looks obvious.” Staining can travel several feet from the actual entry point along a rafter, so what looks like a leak under the glass sometimes turns out to be a head flashing failure two feet away.
Repair Options and What They Typically Cost
The right fix depends entirely on what your diagnosis turned up, not on which repair sounds cheapest.
Reseal. This works when the unit is under roughly 15 years old and the flashing tested dry during your hose test. It replaces failed exterior sealant and restores gaskets. Note that resealing over old, degraded caulk instead of fully removing it is a common shortcut, and that shortcut tends to fail again within 6 to 24 months. A proper reseal always strips the old material first and gets verified with a post-repair hose test.
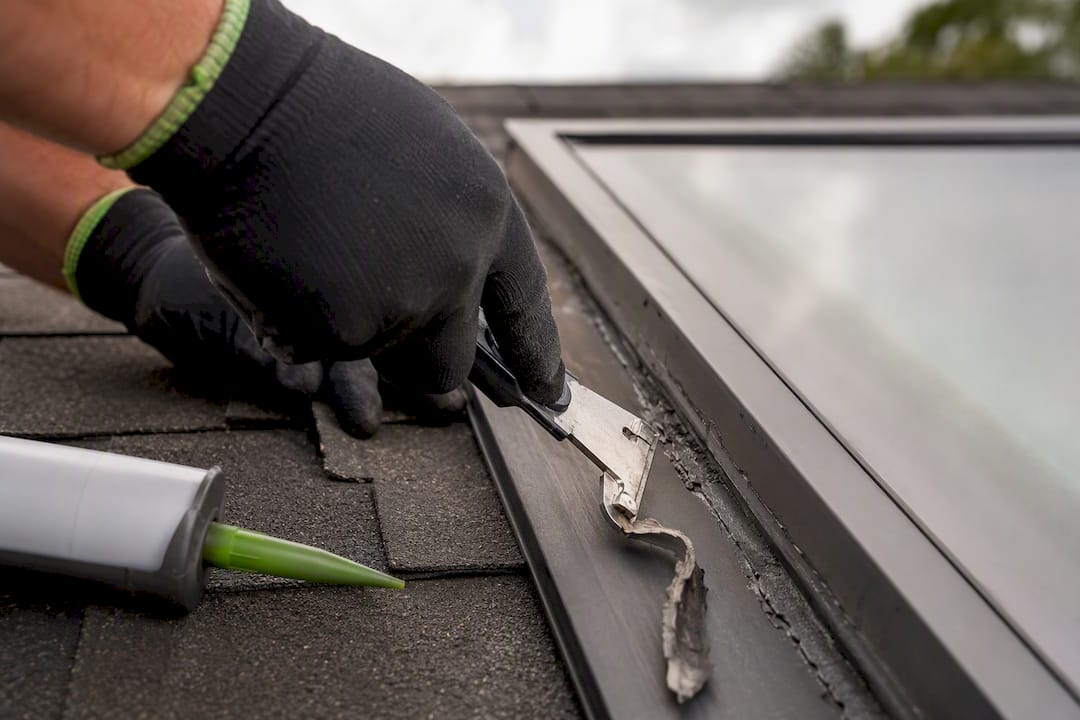
Reflash. When the hose test points to the head, sides, or apron, the fix is a correct manufacturer flashing kit or a full rebuild of the step, head, and apron flashing. Generic flashing or a bead of caulk over old metal rarely holds through a Florida storm season.
Replace. A fogged IGU, cracked or damaged glass, or a unit near the end of its 15 to 25 year service life calls for full replacement rather than another patch.
Avoid these mistakes regardless of which repair you choose: caulking weep holes shut, stacking new flashing over old instead of removing it, and using a flashing kit that doesn’t match your skylight’s exact model.
These U.S. cost bands hold up well across most markets, though material and labor costs in Tampa Bay tend to land toward the middle of each range. If you’re comparing quotes, our guide on reading roofing estimate line items breaks down what a fair scope of work should actually include.
Preventing Skylight Leaks: An Annual Maintenance Checklist
A little maintenance goes a long way toward keeping a skylight watertight for its full lifespan.
- Inspect flashing and sealant every year and again after any major storm.
- Clear leaves and debris from the uphill side of the curb before they dam water against the frame.
- Keep weep holes and drain channels open. Never caulk them shut, even if it seems like it should help.
- Run bathroom and kitchen exhaust fans and insulate the shaft to cut down on condensation.
- Plan to replace the skylight when you reroof, so flashing integrity and warranty coverage stay aligned.
- Insist on manufacturer-specific flashing kits rather than universal parts, and follow that model’s own installation instructions.
Simple habits like clearing debris and checking drainage channels regularly prevent a surprising share of the leaks homeowners end up paying to fix later.
Pro Tip: Set a reminder for the first week of hurricane season. A quick flashing and sealant check in early June catches problems before Florida’s summer storm pattern gets a chance to make them worse.
When to Call a Professional Roofer
Some situations are worth handling yourself. Others aren’t. Call a professional if you see a permanently fogged IGU, staining on structural framing, a leak that returns after you’ve already tried a fix, or if your hose test simply doesn’t produce a clear answer.
When you do call someone, ask for:
- A written diagnosis, not just a verbal guess.
- Photos taken from inside the attic during the inspection.
- A documented, zone-by-zone hose test with results recorded.
- Proof of manufacturer training, licensing, insurance, and warranty coverage on both labor and parts.
If you plan to file an insurance claim, photograph the damage thoroughly and get a contractor’s written estimate before any repair work begins. Persistent moisture that goes unaddressed can lead to mold growth, and CDC guidance is clear that the moisture source needs to be fixed and the materials dried out to protect indoor air quality.
Field Notes From Hytz Roofing
We always recommend coordinating skylight replacement with a full reroof. Tearing off shingles disturbs the flashing around a skylight whether you touch the unit or not, and leaving an old, mismatched skylight in place after a reroof is one of the most common ways future leaks get built right back in. In Tampa Bay, we also tell homeowners to schedule an inspection after any significant hail or wind event, since impact damage to a curb or flashing rarely shows itself until the next hard rain. Our standard diagnostic deliverable includes attic photos and a documented zone hose test, the same approach outlined above.
— Anthony
Get a Skylight Inspection From Hytz Roofing
If you’ve made it this far and you’re still not sure whether you’re looking at a flashing problem, a dying gasket, or plain condensation, that uncertainty is exactly what a proper inspection resolves. Hytz Roofing is a GAF Master Elite Contractor, a distinction fewer than 2% of roofing contractors in North America hold, and every skylight inspection we run includes attic photos and a documented zone hose test rather than a guess from the ground.
After the inspection, you’ll get a written estimate with clear scope options, whether that means resealing, reflashing, or full replacement, along with a straightforward explanation of warranty coverage on both labor and parts. If your leak followed a recent storm, our storm damage repair team can also help document everything your insurance adjuster will need. Ready to find out what’s actually causing your leak? Schedule a free estimate with Hytz Roofing and get a real answer instead of another patch job.
Sources
Skylight leaks almost always come from one of seven places, and knowing which one you’re facing changes everything about the fix. Trade data on skylight repairs points to these as the recurring offenders:
Tampa Bay homeowners rarely deal with ice damming, but every other item on that list shows up regularly here, especially after a hard summer of UV exposure and sudden downpours.
FAQ
Does homeowners insurance cover skylight leaks?
Coverage depends on the cause. Sudden storm or hail damage is typically covered, while leaks from age-related wear like a dried-out gasket or a worn seal usually are not.
How much does it cost to replace a leaking skylight?
Full replacement typically runs $1,200 to $3,500, depending on the unit size and roof access, and generally takes half a day to a full day to complete.
How long do skylights last before they leak?
Gaskets commonly last about a decade or two and sealed glass units around 15 to 25 years, so most leaks start showing up once a skylight is older than about ten years.
Can you repair a leaking skylight?
Yes, in many cases. A reseal or reflash can resolve the issue when the underlying unit and curb are still sound, but a fogged IGU or a cracked curb usually calls for full replacement instead.