Roof Inspection Checklist for Homeowners: 2026 Guide
Roof Inspection Checklist helps homeowners identify common signs of roof damage and prioritize inspections and repairs.
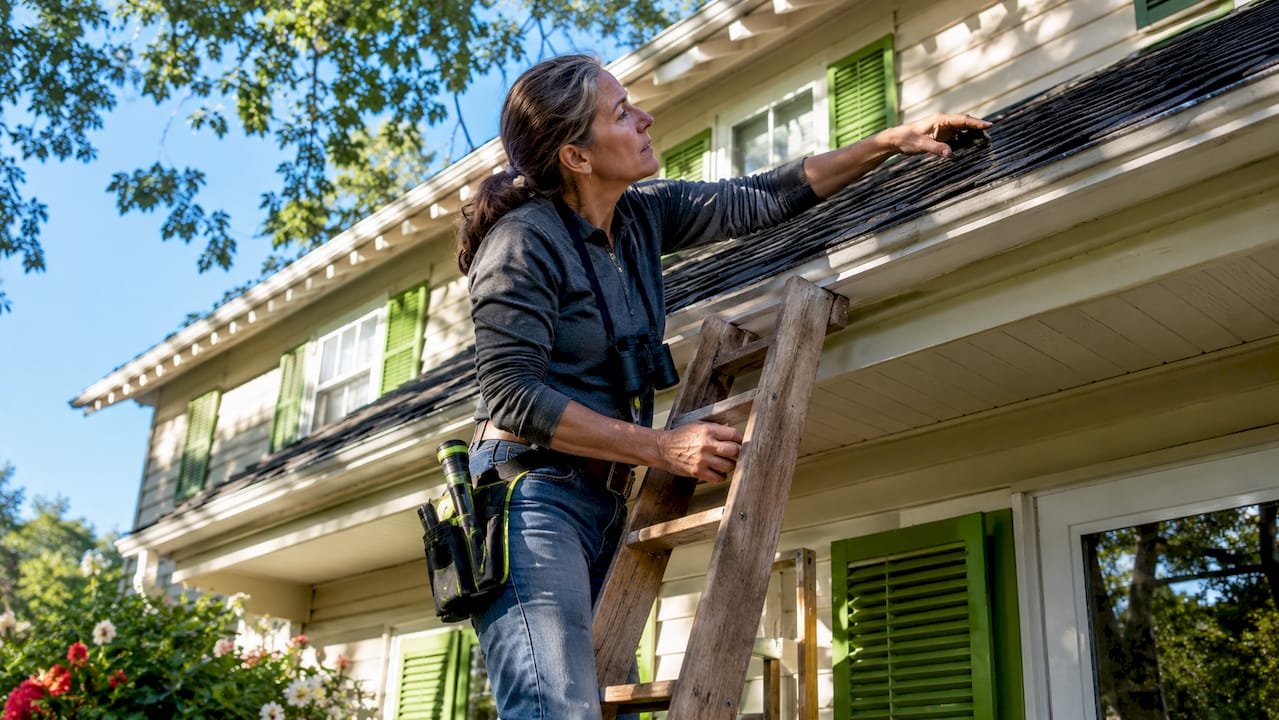
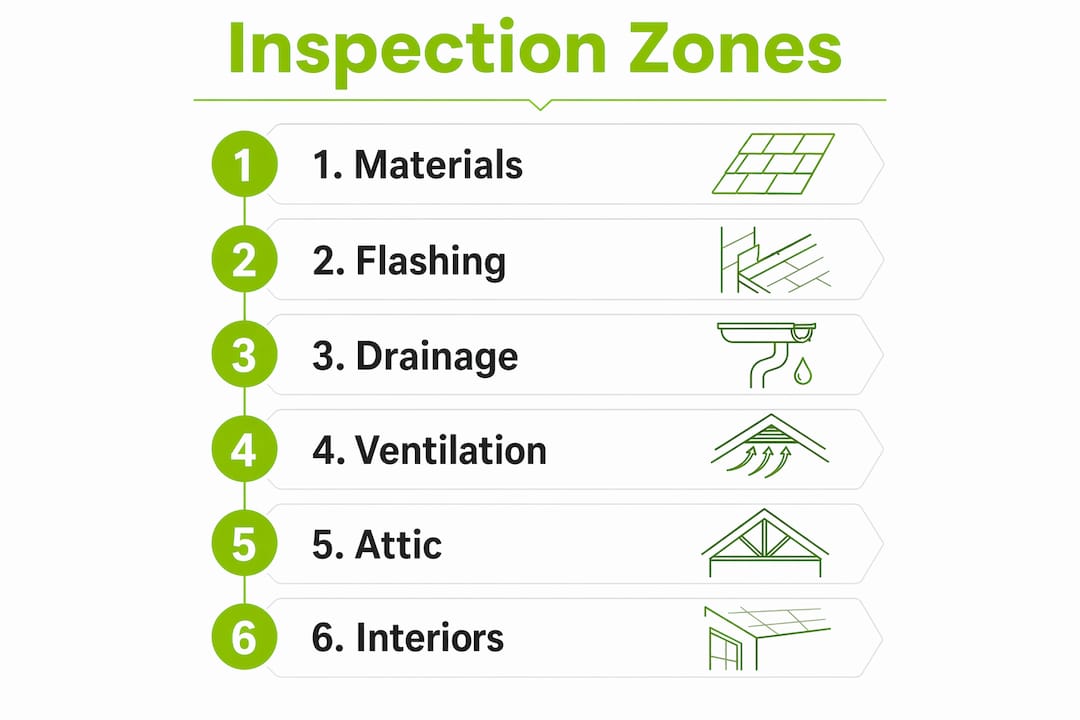
A roof inspection checklist for homeowners is a structured guide covering six critical zones of your roof, giving you a clear method to assess condition, spot early damage, and plan maintenance before small problems become expensive repairs. The six zones every home roof inspection guide should address are roofing materials, flashing, drainage, ventilation, attic interior, and interior ceilings and walls. You do not need to walk on your roof to complete most of this evaluation. Binoculars, a flashlight, a smartphone camera, and a basic checklist or app are enough to conduct a solid baseline inspection from safe ground and attic access points.
What does a roof inspection checklist for homeowners cover?
A complete checklist covers six distinct zones, and skipping any one of them leaves a gap where damage can hide undetected. Each zone tells a different part of your roof’s story.
Zone 1: roofing materials
Start by scanning every slope of your roof from the ground. Look for missing, cracked, curling, or buckling shingles. Granule loss is another key signal. If your asphalt shingles look patchy or faded in spots, granules are washing off, and that accelerates aging. Check for any sagging areas along the ridge line or between rafters, which can indicate structural issues beneath the surface.
Zone 2: flashing
Most leaks start at flashing around chimneys, vents, skylights, and roof-to-wall transitions. Small seal failures at these transition points cause water intrusion before shingles show any visible damage. Use binoculars to scan every flashing joint from the ground. Look for lifted edges, rust staining, or gaps where caulk has pulled away from the surface.
Zone 3: drainage
Walk the perimeter and inspect your gutters and downspouts. Clogged or sagging gutters hold moisture against your fascia and accelerate rot. Look inside gutters for granule buildup, which signals shingle wear. Gutter cleaning is recommended at least twice yearly, and more often if trees overhang your roof. Check that downspouts direct water at least six feet away from your foundation.
Zone 4: ventilation
Soffit vents and ridge vents regulate airflow through your attic. Blocked vents trap heat and moisture, which shortens shingle life from the underside and can cause mold growth. From the ground, check that soffit vents are not painted over or blocked by insulation. From inside the attic, confirm air moves freely from the soffits toward the ridge.
Zone 5: attic interior
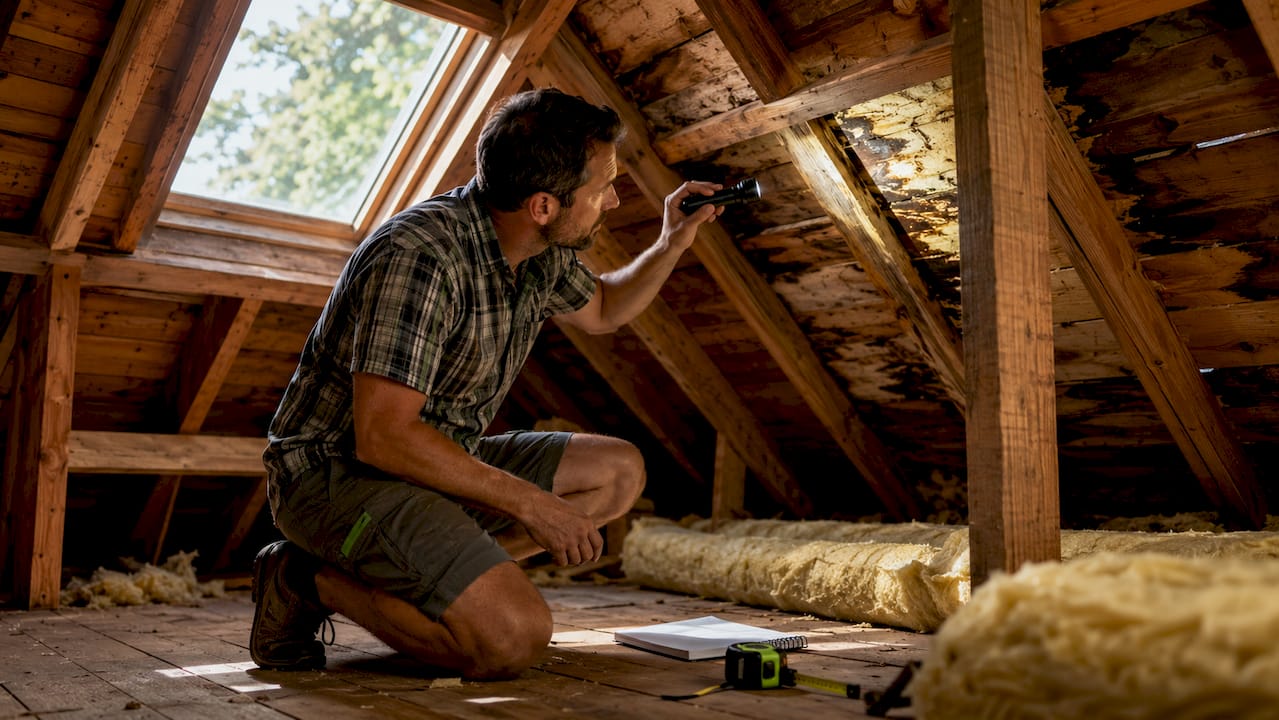
The attic check is the highest-value step in your entire inspection. Turn off the lights on a bright day and look for daylight beams through the roof deck. Any visible light means there is a gap in your sheathing or flashing. Also scan for dark staining on rafters, wet insulation, or a musty smell. These are signs of active or past moisture intrusion.
Pro Tip: Bring a flashlight even on bright days. Daylight reveals gaps, but a flashlight reveals staining and moisture damage in corners and along the ridge that natural light misses.
Zone 6: interior ceilings and walls
Walk through every room directly below the roof. Look for water stains, bubbling paint, or soft spots in drywall. A brown ring stain on a ceiling almost always traces back to a roof leak above. Check closets and attic access hatches too, since these spots are easy to overlook.
When should homeowners perform roof inspections?
The standard recommendation for a seasonal roof inspection checklist is twice per year: once in late spring after winter weather, and once in early fall before storm season. This timing catches damage from the previous season before it compounds.
- Late spring inspection. Check for damage from winter ice, snow load, and freeze-thaw cycles. Look for lifted flashing and granule loss from freeze expansion.
- Early fall inspection. Clear debris from summer storms and prepare drainage before heavy fall rains. Confirm all flashing seals are intact heading into winter.
- After major storms. Inspect after any event with wind above 50 mph or confirmed hail. Do not wait for the next scheduled check. DIY inspection is practical immediately after wind or hail damage to document condition before further weather hits.
- Professional inspections. Schedule a certified roofer every two years for roofs under 15 years old. For roofs older than 15 years, annual professional inspections are the right standard. Professionals use tools like infrared moisture scanners that are not practical for DIY use.
The best time of day for your own inspection is mid-morning on a dry, overcast day. Bright direct sunlight creates glare that washes out surface detail. Wet surfaces hide granule loss and mask staining patterns.
Pro Tip: Always tell someone in your household before you go into the attic or onto a ladder. A simple heads-up is the easiest safety step most homeowners skip.
What tools do you need for a safe roof inspection?
You do not need specialized equipment for a solid baseline inspection. The right tools keep you safe and make your findings useful.
| Tool | Purpose | Ground or Attic Use |
|---|---|---|
| Binoculars | Scan shingles, flashing, and ridge from ground | Ground |
| Flashlight | Spot daylight gaps and moisture stains in attic | Attic |
| Smartphone camera | Document findings with photos and timestamps | Both |
| Non-slip shoes | Safe footing on ladders and attic flooring | Both |
| Notepad or checklist app | Record location and severity of each finding | Both |
Roof walking is reserved for trained professionals due to safety concerns. Baseline visible damage can be recorded from the ground with binoculars and from inside the attic. Roof access increases risk without significantly improving inspection accuracy for homeowners.
Before you start, check the weather forecast. Avoid inspections during or after rain when surfaces are slippery. Let someone in your home know you are inspecting. If your attic has no flooring, step only on joists, never between them.
- Wear rubber-soled shoes with ankle support
- Use a sturdy ladder rated for your weight plus tools
- Never inspect alone if you plan to use a ladder
- Skip the roof surface entirely if you are not comfortable with heights
How to inspect your roof step by step
A complete DIY roof and attic inspection takes 30–60 minutes from safe locations. Here is the sequence that covers every zone without missing anything.
- Walk the perimeter at ground level. Move slowly around your entire home, scanning each roof slope with binoculars. Note any missing shingles, visible sagging, or debris accumulation near valleys and gutters.
- Inspect gutters and downspouts. Check for granules in gutters, which signal shingle wear. Look for sagging sections, separated joints, or downspouts that drain toward the foundation. Clear any visible blockages.
- Check all flashing points. Use binoculars to examine every chimney base, vent pipe collar, skylight frame, and wall-to-roof joint. Look for lifted metal, rust streaks, or gaps in sealant.
- Enter the attic. Turn off the lights and look for any daylight coming through the roof deck. Then use your flashlight to scan rafters and sheathing for dark staining, soft wood, or wet insulation. A musty odor is a red flag even without visible staining.
- Walk through interior rooms. Check every ceiling and upper wall for water stains, soft spots, or peeling paint. Pay extra attention to rooms directly under valleys, chimneys, and skylights.
- Document everything with photos. Photographic documentation of findings improves contractor communication, repair accuracy, and insurance claim processing. Photograph each issue with a reference point in the frame so a contractor can locate it quickly.
- Decide on next steps. Minor granule loss or a single lifted shingle may be a watch-and-wait situation. Visible daylight in the attic, active staining, or any flashing failure should go straight to a professional for evaluation.
Pro Tip: Create a simple folder on your phone labeled with the inspection date. Drop all photos there immediately. When you call a contractor six months later, you will have a clear timeline of when each issue appeared.
Common mistakes to avoid after your inspection
Completing the inspection is only half the job. What you do with the findings determines whether the inspection actually protects your home.
- Do not ignore flashing problems. Flashing failures are the leading cause of residential roof leaks. A small gap at a chimney base can let in enough water to rot the decking beneath before you see a ceiling stain.
- Do not skip the attic check. Many homeowners only scan from the ground and miss active moisture intrusion that is already damaging the structure. The attic check is the step that catches leaks before they reach your living space.
- Do not delay gutter cleaning. Debris and clogged gutters accelerate roof aging by holding moisture against fascia and increasing rot and mold risk. Clean gutters are part of your inspection, not a separate chore.
- Do not walk the roof without training. The risk of a fall is real, and the inspection value from rooftop access is minimal for a homeowner compared to ground plus attic checks.
- Use your documentation. Photos and notes from your inspection are your record for insurance claims, contractor estimates, and warranty discussions. File them somewhere you can find them. A documented inspection history speeds up every conversation you have with a roofer or insurer.
- Schedule repairs promptly. Finding a problem and waiting six months to address it turns a $300 flashing repair into a $3,000 decking replacement. Use your inspection findings to build a repair priority list and act on it.
Regular roof maintenance between inspections, including debris removal and gutter clearing, extends the life of your roof and reduces the number of issues you find at each check.
Key takeaways
A roof inspection checklist for homeowners works because it structures your evaluation across six specific zones, prevents missed failure points, and gives you the documentation needed to act fast when problems appear.
| Point | Details |
|---|---|
| Six zones cover everything | Inspect roofing materials, flashing, drainage, ventilation, attic interior, and interior ceilings every time. |
| Twice yearly is the baseline | Inspect in late spring and early fall, plus after any major storm or hail event. |
| Attic check beats roof walking | Flashlight inspection inside the attic detects leaks earlier and more safely than walking the roof surface. |
| Document every finding | Photos with timestamps speed up contractor estimates, warranty claims, and insurance processing. |
| Flashing fails first | Most leaks originate at flashing transitions, not shingle surfaces, so prioritize those areas every inspection. |
Why i think most homeowners underestimate the attic check
After years of working alongside roofing professionals and seeing the results of hundreds of inspections, the pattern is consistent. Homeowners who skip the attic check miss the most telling evidence every time. You can scan shingles from the ground for twenty minutes and miss an active leak that has been staining rafters for two seasons. Two minutes in the attic with a flashlight tells you more.
The other thing I have seen repeatedly is homeowners treating the inspection as a pass-or-fail test. They look, see no obvious holes, and declare the roof fine. A real inspection is about catching the early signals: a small rust streak on flashing, a faint stain on a rafter, granules accumulating in one corner of a gutter. Those details are the difference between a $400 repair and a $15,000 replacement.
I also want to be direct about safety. The risk of roof walking without training is not worth it. You gain very little inspection value from being on the surface that you cannot get from binoculars and an attic check. Know your limits, and call a certified professional when you find something you cannot clearly identify. The cost of a professional inspection is far less than the cost of ignoring a leaky roof for another season.
The homeowners who get the most out of their inspections are the ones who treat it like a routine, document consistently, and build a relationship with a trusted contractor before they have an emergency. That preparation is what keeps a roof performing for its full lifespan.
— Anthony
ready to take your inspection further?
Your DIY checklist covers the visible baseline. But some issues, like hidden moisture intrusion, structural flashing failures, and decking damage, require professional tools and trained eyes to catch accurately.
Hytzroofing is a GAF Master Elite® Contractor in Florida, a designation earned by fewer than 2% of roofing contractors across North America. When your inspection turns up something that needs a closer look, the Hytzroofing team brings certified expertise, infrared moisture detection, and a written report with severity ratings. Whether you need a professional follow-up inspection or repairs from what you found today, Hytzroofing is ready to help. Get in touch for a free estimate.
FAQ
What are the six zones of a home roof inspection?
The six critical zones are roofing materials, flashing, drainage, ventilation, attic interior, and interior ceilings and walls. Covering all six gives you a complete picture of your roof’s condition.
How often should homeowners inspect their roof?
Inspect twice per year, in late spring and early fall, plus after any major storm. Roofs older than 15 years benefit from annual professional inspections in addition to your DIY checks.
Is it safe to walk on my roof during an inspection?
No. Roof walking carries significant fall risk and adds little inspection value for homeowners. Binoculars from the ground and a flashlight in the attic cover the same ground more safely.
What is the most important step in a DIY roof inspection?
The attic check is the highest-value step. Turning off the lights and looking for daylight through the roof deck, then scanning with a flashlight for staining and moisture, detects active leaks before they reach your living space.
Why does documentation matter after a roof inspection?
Photographic documentation speeds up contractor estimates, supports insurance claims, and creates a timeline that helps identify when damage first appeared. Store photos with the date in a dedicated folder on your phone or cloud storage.
Recommended
- The Ultimate Cost of Ignoring a Leaky Roof What Homeowners Need to Know
- Weathering the Storm Expert Tips for Roof Leak Repair in Tampa Fl
- Types of Roof Repairs Florida Homeowners Need Most
- Introducing Enviroshake to Your Hoa
Related Hytz Roofing Services