Emergency Roof Tarping: What to Do in the First Hour
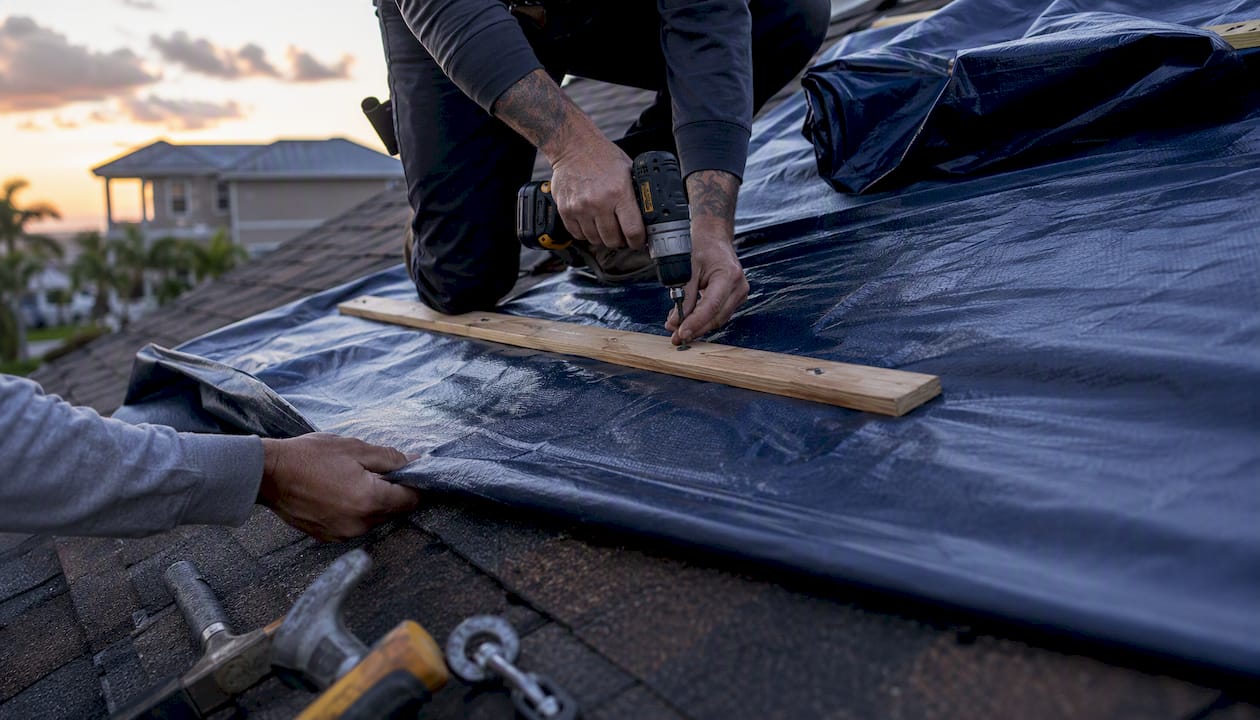
Stop the water first. Move furniture, slide buckets under active drips, and throw a tarp over anything you can’t move. Then make one decision: is it safe to get on your roof, or do you call for professional emergency roof tarping right now? If wind is still gusting, the roof pitch is steep, or you’re dealing with a two-story home, the answer is call. OSHA’s roofing safety guidance is blunt about this. Falls are the leading cause of death in roofing work, and a wet, storm-damaged roof multiplies every one of those risks.
Here’s the honest math: a tarp that fails because it was installed unsafely or incorrectly costs you the same water damage you’re trying to prevent, plus a possible fall injury. Hytz Roofing Inc. runs 24/7 dispatch across Tampa Bay for exactly this reason. When a hurricane band or a summer supercell rips shingles loose, the priority isn’t speed for its own sake. It’s getting a secure, correctly anchored cover on the roof before the next rain band hits, and having it documented the way insurers expect.
Do these things in order, starting the moment you notice water inside:
- Kill the electricity to any room with active water intrusion near outlets or fixtures if you can safely reach the breaker panel.
- Contain the water with buckets, tarps over furniture, and towels along baseboards.
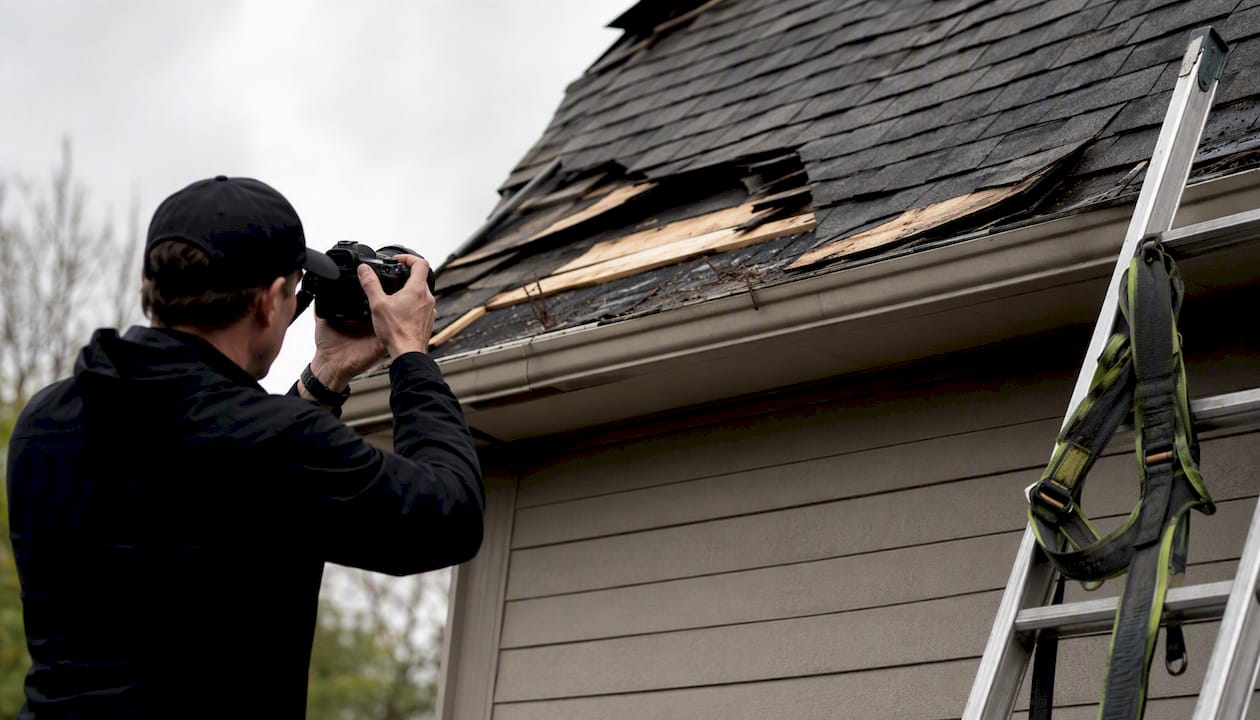
- Photograph everything — ceiling stains, dripping points, and any visible exterior damage from the ground.
- Check the weather window. If wind is above 15 mph or rain is still falling, do not go on the roof.
- Call a licensed 24/7 emergency tarping service if the roof is steep, wet, multi-story, or you’re working alone.
- If conditions are genuinely safe, proceed with a temporary tarp using the method later in this guide.
A tarp only works if it survives the next storm. FEMA’s disaster documentation standards and most insurance policies treat a poorly secured tarp the same as no tarp at all: it’s evidence you attempted mitigation, but it won’t stop the claim from ballooning if water keeps getting in.
Key Takeaways
The fastest path to stopping storm damage is interior mitigation first, then a safety check, then either a correctly anchored tarp or a call to a 24/7 professional crew.
| Point | Details |
|---|---|
| Stop water inside first | Use buckets, towels, and furniture covers while you decide on tarping or calling a pro. |
| Know your limits | Skip DIY tarping on steep, multi-story, or storm-active roofs; call a licensed crew instead. |
| Anchor correctly | Wrap the top edge under the shingle course with a 2x4 nailer to shed water instead of trapping it. |
| Watch the calendar | Standard tarps last roughly 30 to 45 days; schedule permanent repair before UV breaks them down. |
| Document everything | Photos, receipts, and a written contractor invoice are what insurers expect for mitigation claims. |
| Call Hytz Roofing for same-day help | Hytz Roofing offers 24/7 emergency tarping, GAF Master Elite installation standards, and insurance documentation support across Tampa Bay. |
Table of Contents
- What Is Emergency Roof Tarping and When Do You Need It?
- When Should You Call a Professional Instead of Tarping Yourself?
- What Materials and Tools Do You Need for a Temporary Roof Cover?
- How Do You Install an Emergency Roof Tarp Step by Step?
- Does Tarping Work Differently on Flat Roofs Than Pitched Roofs?
- How Long Does an Emergency Roof Tarp Actually Last?
- What Does Emergency Roof Tarping Cost, and What Does Insurance Cover?
- What Should You Expect From a Professional Emergency Tarping Service?
- A Roofer’s View on What Matters First During a Storm Callout
- Why Hytz Roofing Should Be Your First Call for Emergency Roof Tarping
- Sources
- FAQ
What Is Emergency Roof Tarping and When Do You Need It?
Emergency roof tarping is a temporary, weatherproof cover installed over storm-damaged sections of a roof to stop water intrusion until permanent repairs happen. It’s not a repair. It’s a stopgap, and knowing when to use one versus when to wait or call a pro is the difference between a controlled situation and a bigger claim.
You need a tarp when you can see or clearly identify one of these conditions:
- An active leak with visible daylight, missing shingles, or exposed roof decking.
- Wind-lifted shingles or tiles that have curled back or blown off entirely.
- A visible puncture or hole in the deck from fallen branches or debris.
- Flashing failure around chimneys, vents, or skylights that’s letting water track inward.
- Granule loss or cracked tile so severe the underlayment is exposed to direct rain.
You should not tarp yourself when any of these apply, even if the damage looks minor:
- A storm is still active, or wind gusts exceed 15 mph.
- Your roof pitch is steeper than a standard walkable slope (roughly 6:12 or greater).
- Your home has two stories or more.
- You don’t have a helper on the ground or on the roof with you.
- You have no fall protection, stable ladder setup, or roofing experience.
If two or more of those “don’t” conditions apply, skip the DIY attempt entirely. It’s not worth the fall risk, and a same-day emergency roof tarping crew can usually be on-site faster than you’d expect, even during widespread storm events.
When Should You Call a Professional Instead of Tarping Yourself?
Some situations are non-negotiable. If you see a downed power line anywhere near your property, don’t touch the roof, the ladder, or even the gutter. Call the utility company and your emergency roofer separately. A sagging ceiling is another hard stop. That’s a sign the structure may already be compromised, and adding your body weight to the roof above it is a real risk of collapse.
Run through this safety checklist before anyone climbs a ladder:
- Set the ladder on level, stable ground at a 4:1 angle (one foot out for every four feet of height).
- Wear non-slip shoes, gloves, and eye protection at minimum.
- Maintain three points of contact at all times while climbing.
- Never work alone. Have someone below who can call for help.
- Check for exposed wiring, damaged gutters, or unstable decking before putting weight on any section.
Pro Tip: If you’re debating whether conditions are “safe enough,” they usually aren’t. Professional crews carry fall-protection harnesses, anchor points, and insurance coverage specifically because roof work carries real liability. That safety margin is the biggest reason to call rather than climb.
Beyond the fall risk, a trained crew moves faster and documents better. They know how to evaluate hazards in minutes, they carry the right anchor materials already cut to size, and they photograph the damage in a format insurance adjusters actually recognize. Industry guidance on emergency tarping decisions makes a similar point: a poorly installed tarp can funnel water under the cover instead of shedding it, which sometimes creates a worse leak than the original damage.
What Materials and Tools Do You Need for a Temporary Roof Cover?
Buying the wrong tarp is one of the most common mistakes homeowners make under pressure. A cheap painter’s tarp from the garage will not survive a Florida thunderstorm. Look for a minimum 6-mil polyethylene tarp, and go heavier (10 mil or more) if you expect more than a week or two before permanent repair.
Your shopping and prep list should include:
- A heavy-duty, UV-treated tarp sized to cover the damaged area plus a 4-foot overlap on all sides, extending over the roof ridge if the damage sits near the peak.
- 2x4 furring strips to use as nailer boards along the tarp’s top edge.
- 3-inch deck screws (not roofing nails, which puncture the tarp itself).
- Sandbags or weighted anchors for flat and low-slope sections where screws aren’t practical.
- Rope or nylon cord for additional tie-downs on windy days.
- Roofing sealant for small gaps around penetrations.
A roof tarp sizing calculator is worth using before you buy anything. It rounds your measurements up to the nearest standard tarp size and estimates how many nailer boards and screws you’ll need, which saves a second trip to the hardware store mid-repair. Keep every receipt. Insurers reimburse mitigation materials, but only when you can show what you bought and when.
How Do You Install an Emergency Roof Tarp Step by Step?
The method that actually works starts at the top of the damaged area, not the bottom. You anchor the tarp’s upslope edge under the shingle course above the damage, then let gravity and tension do the rest of the work shedding water downhill.
- Assess the ground and roof conditions one more time. If wind has picked up since your last check, wait.
- Measure the damaged area and add at least 4 feet of overlap in every direction, including over the ridge if the hole is near the peak.
- Unfold and position the tarp loosely over the area first to confirm coverage before securing anything.
- Wrap the top edge of the tarp around a 2x4 and slide that board under the shingle course above the damage, then screw the board into the deck at even intervals.
- Pull the tarp downslope with even tension and wrap the bottom edge around a second 2x4, securing it below the damaged section.
- Anchor both side edges the same way, using shorter furring strips or sandbags depending on the roof pitch.
- Add extra tie-downs across the middle of large tarps in wind-prone areas to prevent ballooning.
- Inspect from the ground and, if safe, from inside the attic for daylight or gaps once the install is complete.
Every step here follows the same standard tarping method professional crews use, and it’s designed to buy 30 to 90 days of protection when done correctly. Before you climb down for the last time, take photos of the finished install from multiple angles and note the date. That timestamp matters later.
Pro Tip: The single most common DIY mistake is undersizing the tarp or leaving the edges loose. A tarp that doesn’t overlap far enough, or one nailed through with roofing nails instead of screwed down on a furring strip, will leak within the first heavy rain. If you can, sketch or photograph where each nailer board sits relative to the ridge line so your permanent-repair contractor has a clear reference later.
Does Tarping Work Differently on Flat Roofs Than Pitched Roofs?
Yes, and the difference comes down to one thing: gravity. On a pitched roof, water runs downhill naturally, so your job is mostly about anchoring the tarp so wind can’t lift it. On a flat or low-slope roof, water doesn’t run anywhere on its own, which means pooling is the real enemy, not wind uplift.
For flat and low-slope sections:
- Use sandbags or weighted anchor systems instead of screws wherever possible, since deck penetrations on a flat roof create new leak points.
- Shape the tarp to create a slight slope toward existing drains or scuppers rather than leaving it flat.
- Check for standing water daily. Pooled water adds weight and stress the tarp wasn’t designed to hold long-term.
For pitched roofs:
- Rely on 2x4 nailers and screw anchors at the top and bottom edges, as described in the step-by-step method above.
- Wrap the tarp fully over the ridge when the damage sits within a few feet of the peak, so wind can’t get underneath from the opposite slope.
- Add extra side anchors in open, wind-exposed areas, which is most of Tampa Bay during hurricane season.
Pro Tip: If your home has a mix of both, like a pitched main roof with a flat porch or garage extension, treat each section separately. What works to anchor the steep slope will not hold on the flat section, and vice versa.
How Long Does an Emergency Roof Tarp Actually Last?
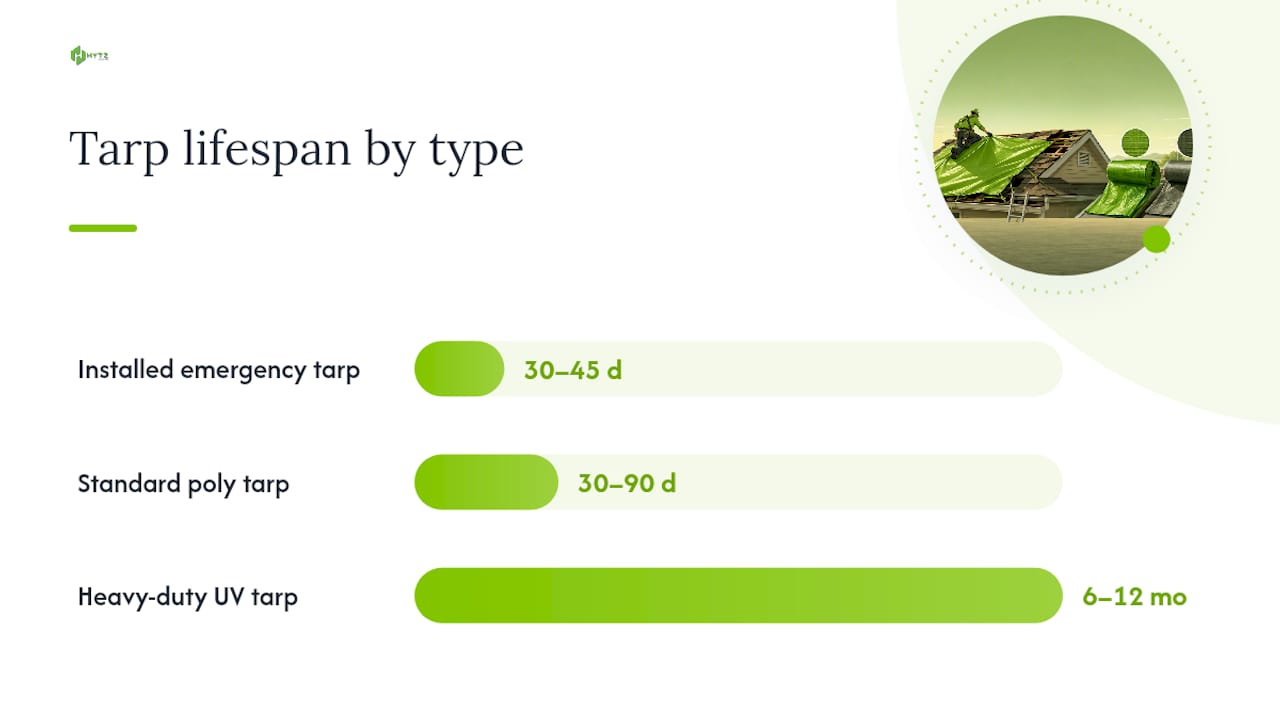
A correctly installed emergency tarp typically holds up for 30 to 45 days before UV exposure and wind stress start breaking down the material. Standard poly tarps generally last 30 to 90 days depending on sun exposure and storm frequency. Heavy-duty, UV-treated tarps can stretch that to 6 to 12 months, and shrink-wrap roof systems (used more often by commercial crews) last longer still. Florida’s intense UV index means poly tarps here degrade faster than the same product would in a milder climate, so lean toward the heavier-mil option if permanent repair might be delayed.
While the tarp is up, check it on a regular schedule:
- Look inside the attic weekly for new moisture, staining, or daylight around the tarped area.
- Walk the perimeter from the ground to check tension and look for loose edges or flapping corners.
- Check for pooled water on flat sections after every rain.
- Inspect anchor boards for looseness, especially after any wind event.
- Re-check the entire installation after any subsequent storm, even a minor one.
Move to permanent repair as soon as materials and scheduling allow, ideally within that 30 to 45 day window. Insurers generally treat tarping as expected, reimbursable mitigation, but they usually want an adjuster to document the damage before permanent repairs begin. Don’t let the tarp sit past its realistic lifespan just because the adjuster hasn’t shown up yet. Call your contractor and your insurer if there’s a delay.
What Does Emergency Roof Tarping Cost, and What Does Insurance Cover?
Costs vary widely depending on whether you do it yourself, hire a standard contractor, or need after-hours emergency response during a widespread storm event.
| Approach | Typical Cost Range | Notes |
|---|---|---|
| DIY materials only | typically low cost range | Tarp, furring strips, screws, and sandbags for a small to mid-size area. |
| Professional emergency tarping | $400–$1,500 | Includes labor, hazard assessment, and standard materials. |
| After-hours or storm-surge pricing | $1,500–$2,000+ | Common during widespread hurricanes when demand spikes across a region. |
These emergency tarping cost ranges reflect what’s typical across a season, but expect the high end during a major named storm when every roofing crew in the region is booked solid.
Most homeowners insurance policies cover reasonable emergency mitigation, including tarping, as long as you document it properly. Here’s what insurers typically expect:
- Dated photos of the damage before any tarp goes up.
- Photos of the completed tarp installation, timestamped if possible.
- Itemized receipts for any materials purchased.
- A written invoice from your contractor describing the mitigation work performed.
- A brief written description of what happened and when you noticed it.
Do the mitigation. Don’t do the permanent repair before your adjuster inspects the damage. Jumping straight to a full roof replacement before documentation happens is one of the fastest ways to complicate a claim.
What Should You Expect From a Professional Emergency Tarping Service?
A properly run emergency tarping crew follows a defined process, not a rushed climb-and-cover job. SERVPRO’s documented process for storm response includes hazard evaluation, debris removal, precise measurement, and secure installation, all built around minimizing further damage while keeping technicians safe. A weeks-long protection window is standard when the installation follows a proper needs analysis rather than a quick guess at sizing.
Here’s what a competent crew does on arrival:
- Evaluates the roof and surrounding hazards before anyone climbs.
- Removes debris that could puncture the tarp or hide additional damage.
- Measures the affected area and prepares tarp and anchor materials to size.
- Installs the tarp using anchor boards, not adhesive tape or makeshift weights.
- Inspects the attic interior for hidden moisture or secondary leaks.
- Photographs the full job and provides a written invoice for insurance purposes.
Before you hire anyone, ask these questions:
- Are you licensed in Florida, and can you provide your contractor license number?
- Do you carry general liability insurance and workers’ compensation coverage?
- Are you GAF Master Elite certified or manufacturer-certified in any capacity?
- What’s your BBB rating, and can I see recent customer reviews?
- Is there a written guarantee on the temporary tarping work itself?
For a home with visible wind-damaged shingles after a storm, a properly credentialed crew should be able to respond same-day in most cases, even during a regional storm event, and hand you documentation you can pass directly to your insurance adjuster.
A Roofer’s View on What Matters First During a Storm Callout
When our crews pull up to a storm-damaged roof in Tampa Bay, the first five minutes aren’t spent climbing a ladder. They’re spent walking the property, checking for downed lines, looking at the roof pitch and wet conditions, and deciding whether it’s actually safe to be up there at all. Homeowners often expect us to move fast and skip straight to the tarp. We don’t, because a rushed job on an unstable roof helps no one, least of all the person paying for it.
Documentation comes almost as early as safety in our process. We photograph the damage before touching anything, because that record is what turns a stressful storm event into a straightforward insurance claim instead of a drawn-out dispute. Hytz Roofing runs 24/7 dispatch across Tampa Bay specifically because storm damage doesn’t wait for business hours, and our GAF Master Elite® status means every install, even a temporary one, follows a standard we’d defend to any adjuster who asks about it.
Why Hytz Roofing Should Be Your First Call for Emergency Roof Tarping
Hytz Roofing runs 24/7 emergency dispatch across Tampa Bay, which means when a storm rolls through at 2 a.m., you’re not waiting until Monday morning for a callback. Our crews handle emergency tarping, board-up, and full documentation for your insurance claim in one visit, and we coordinate directly into permanent repair scheduling once your adjuster signs off. That continuity, one crew from the first tarp to the final repair, is the practical advantage over piecing together a DIY fix and a separate repair contractor later.
We hold a BBB A+ accreditation, the 2024 Brava Roof Tile Excellence Award, and the 2025 Angi Super Service Award. If your home needs storm damage restoration in Tampa, have your address, a description of the damage, and any photos ready when you call. That’s what lets our dispatch team send the right crew size and materials on the first trip.
Sources
- OSHA guidance on fall protection and roofing safety
- How to Apply Emergency Roof Tarp — Roofs Wiki
- How to Fix a Roof Leak: 2026 Step-by-Step | The Roofing Brief
- Emergency Roof Tarping Cost (2026): $400–$2,000 + Per Sq Ft
- Roof Tarp Calculator — Shingles Calculator
Keep these on hand if you need to double-check a technical detail or want a reference to share with your insurance adjuster.
FAQ
How do you emergency tarp a roof safely?
Anchor the tarp’s top edge under the shingle course above the damage using a 2x4 nailer board, pull it tight downslope, and secure both the bottom edge and sides with additional boards or sandbags. Only attempt this if wind is under 15 mph, the roof is walkable, and you have a helper on the ground.
How much does it cost to tarp a roof?
DIY materials typically run $50 to $150, while professional emergency tarping usually costs $400 to $1,500, with after-hours or storm-surge pricing sometimes pushing above $2,000 during major regional storms.
How do you temporarily cover a leaking roof?
Stop interior water damage first with buckets and furniture covers, then either install a properly anchored tarp yourself if conditions are safe or call a 24/7 emergency roofing service like Hytz Roofing to handle it.
How long does an emergency tarp last?
A correctly installed standard tarp typically lasts 30 to 45 days, while heavy-duty UV-treated tarps can last 6 to 12 months, so schedule permanent repair within that window.
Will insurance pay for emergency roof tarping?
Most homeowners policies cover reasonable mitigation costs like tarping when you document the damage with photos, keep receipts, and get a written invoice, though permanent repairs generally should wait until after adjuster inspection.
When should you call a professional instead of tarping yourself?
Call a pro immediately if you see downed power lines, a sagging ceiling, active storm conditions, or if your roof is steep or multi-story, since these situations carry serious fall and structural risks that outweigh any time saved.